Estimated reading time: 19 minutes
MRE stands for “Meals Ready to Eat.” They originated with the U.S. military and many armed forces around the world have adapted the concept. Each meal is usually packaged in a sealed Mylar pouch and contains a variety of foods to define a meal. The MRE’s were intended to be single-serve meals supplying a range of foods with each MRE. Desert Storm in 1990 saw the first widespread use of MRE’s as food for the troops.
The meal itself is usually centered around an entrée also sealed in a Mylar pouch. In fact, most of the contents of an MRE are essentially Mylar pouches sealed in the main Mylar package. That’s a lot of Mylar but the material has excellent food preservative properties and that’s what MRE’s are all about.
Article continues below.
How the Military Preserves Food in MRE’s
In a word: “radiation.” The food in many military MRE’s is literally irradiated to kill bacteria and essentially sterilize the food. This irradiating process is always accompanied by the usual reassurances that it’s safe and there’s nothing to worry about. How much you agree with that is up to you, but we’re going to skip the irradiating part.
Want to save this post for later? Click Here to Pin It On Pinterest!
What Does a Standard MRE Look Like?

Here’s an example of what you’ll find in a typical MRE. It includes:
- A main meal entrée
- A side dish
- Dessert
- Crackers or bread
- Cheese and peanut butter or jelly
- A powdered drink beverage
- Candy
It also has an accessory packed which includes:
- A flameless heater
- Utensils usually a knife and spork
- Gum
- Matches
- Spices
- And due to frequent requests from the troops: Tabasco hot sauce
- Options sometimes included toilet paper and toothpicks
Were MRE’s Popular with the Troops?

In a word, “no.” The biggest complaint was constipation and a lack of variety. A common lament was that all of the entrees tasted the same as various gravies and sauces would show up with various pastas and rice, all sharing the same consistency and texture. The military took some steps to address those complaints and we will as well.
Meat was always on the menu but usually hidden in the background as a meat powder or a flavored TVP (textured vegetable protein). Some variations included a whole Salisbury steak thanks to the wonders of irradiation and some other meats were added to the mix.
The greatest benefit of MRE’s was their shelf-life and indestructibility. They we’re also designed to be easy to prepare and sufficiently nutritious.
So How Do We Make a Homemade MRE?
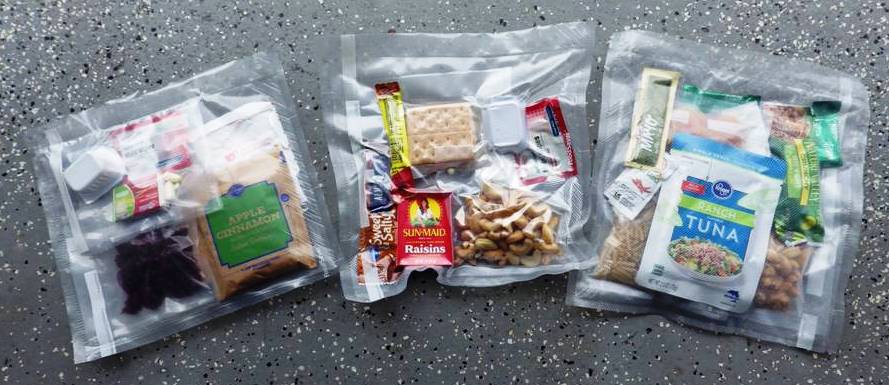
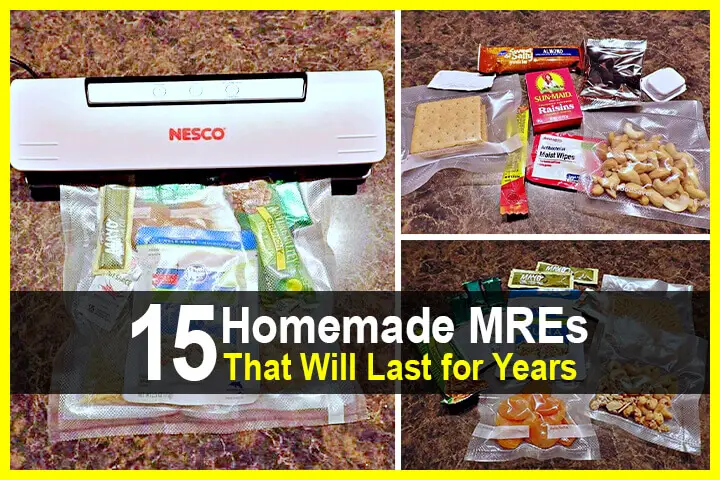
To begin with, we’re going to skip the whole irradiation thing. Instead we’re going to rely on a dehydrator (or a conventional oven); a vacuum sealer and a few of those Mylar Bags. That’s the easy part. The work begins as we try to determine which foods to pack in our homemade MRE’s.
What We’ll Try to Do Better
Most MRE’s don’t match the profile of health food. They’re intended to be survival food and many of the menu choices are driven by extremely long shelf-life potential and calorie count. Both are important for long-term food storage and survival but many of the calories are calories from carbohydrates.
There’s also a glaring lack of fruit and vegetables with the exception of the jelly. Peas and carrots sometimes show up in the beef stew entrees and tomato sauce is usually a big part of some of the pasta options. And it’s not like they don’t try. Some MRE’s will promise things like spinach and bok choy. It’s another thing if you can find it let alone recognize it in the meal.

As a result, we’re going to make an effort to use our dehydrator to get some fruits and vegetables into our homemade MRE’s. We’re also going to make sure we add some cereal grains like rolled oats to help with that constipation complaint.
Our biggest challenge will be the entrees. In that regard we may contradict the “ready to eat” promise of an MRE and require some water and cooking time to finish the meal. We have to keep the water out to retain a decent shelf-life measured in years. The only option would be irradiating the food and that sounds real complicated.
Consequently, we’re going to embrace “hurdling” with some of our food items. Hurdling involves combining food preservative techniques to enhance overall shelf-life and food safety.
Meal Packaging
MRE’s are dedicated to a meal daypart. Most are main meals intended for dinner but there are also breakfast and lunch MRE’s. We’re going to make all 3 dayparts and cover some variations.
Food Dehydrator 101

Because we’re going to depend on dehydrating food for so much of what we pack in our MRE’s, it’s probably worth covering some of the basics of using a food dehydrator.
The simplest advice is to simply follow the directions for use included with the dehydrator. What’s important for our purposes is to make sure the foods are fully dehydrated. One of the common tips is to turn your foods midway through the dehydration process to make sure both sides are fully dehydrated.
One of the things you can do with your food dehydrator is drying purees. It’s similar to the process for making “fruit leather.” Things you can puree and dehydrate on parchment paper include pasta sauce, bananas, mashed potatoes, refried beans, hummus and even yogurt. You can then add them as ingredients to a recipe for an entrée or package it as a side-dish.
If you don’t have a food dehydrator you can use a conventional oven set on 150 to 200 degrees Fahrenheit. Timing depends on the food type but it’s wise to check it every hour and turn the foods each time. It can take up to 6 hours or more so be patient, and make sure your food is totally dehydrated or you may have spoilage over time.
Buy Items Pre-packaged
We’ll also look at prepared and prepackaged options that have already been dehydrated. It all depends on your budget and your time. If you don’t have the time to do-it-yourself with a dehydrator, you can buy a lot of foods already dehydrated that may or may not require some repackaging with the vacuum sealer. Mashed potato flakes from a box are a good example.
The one challenge you may encounter with food dehydration occurs with root vegetables. Things like carrots, beets, or any other root vegetable require a bit of time to rehydrate. Some recommendations go up to 2 hours of soaking in water. If you don’t rehydrate them sufficiently they’ll have the consistency of shoe leather.
Dehydrating them as small bits helps, but if you think you’ll be in a hurry to eat avoid some of root vegetables in your meals, or make sure you chop them into easily rehydrated bits. Potatoes are an exception if pureed and dried into potato flakes.
Vacuum Sealer Basics

Another important tool for making MRE’s is a vacuum sealer. Removing the oxygen from a package goes a long way towards preserving the food. Most offer rolls of plastic bags that can be cut and sealed to any size. We’ll be doing a lot of that.
You can also use your vacuum sealer to seal Mylar bags. Mylar is a thin foil that is often used for food preservation and is a common type of packaging in commercial and military MRE’s.
Here again, follow the manufacturer’s directions and be careful when vacuum sealing any foods that have any level of moisture content. The liquids can get vacuumed into the sealer and compromise its function. If you are sealing something with a high moisture content, freeze it first to solidify the liquids.
Another food preservation option is freeze-drying. You can buy a freeze dryer although they tend to be much more expensive than dehydrators and vacuum sealers. For now we’re going to stick with the less expensive options.
Oxygen Absorbers and Desiccants
Many long-term food storage solutions include an oxygen absorber to remove any oxygen resident in the package. Another addition is a desiccant powder packet to absorb any excess moisture. You can buy them in bulk and they’re a good idea if you are planning to store your homemade MRE’s for any length of time.
Accessory Packets
An accessory packet should be included with each meal. On a fundamental level you should at least include a packaged hand-wipe and a water purification tablet like Potable Aqua. If you have to find and purify water for a beverage or to finish the meal you can at least make sure it’s purified. Boiling the water could also work but if a meal doesn’t require cooking a water purification tablet keeps things simple.
We’re going to assume that you have basic utensils like a knife, fork and spoon but if you’re concerned about those, add them to your MRE’s. Plastic utensils work fine.
Each meal will also have other accessories from condiments to seasonings. You can add anything else you like (even toilet paper) but don’t get carried away or the meal package could become too bulky.
The Calorie Question
On a fundamental level, the success of any survival food is measured by its calorie count. The average requirement for an, active adult male is a minimum of 2,500 calories a day to maintain their weight and energy levels. An active woman can get by with 2,000 calories a day and calorie counts for children vary by age and body weight.
One of the things you should constantly monitor as you put together meals is the total calorie count. Set 2500 calories a day as a goal. On a basic level you could shoot for 850 calories per meal assuming 3 meals a day to get to 2,500 calories. That will vary by meal as you go but you want to always reach 2500 calories by the end of the day.
One of the ways to boost calories without adding weight or bulk is with small, pre-packaged condiments like mayonnaise, honey, honey-mustard or any other condiment that delivers a good amount of calories for its size.
In addition we’ll keep an eye on other nutritional considerations like foods rich in vitamins and minerals, but we’re also going to add a couple of multi-vitamins to each breakfast meal: both an adult dose and kid’s dose. The army used to include 2 cigarettes in their C-rations during World War II so we can at least add a couple of vitamins.
Making MRE’s

We’re going to start with the breakfast for our first few MRE’s, and then we’ll move on to lunches and dinners. Like we mentioned previously, some of these menu choices will require some basic preparation usually involving the addition of hot water to finish the meal. We’ll try to avoid that when possible but it’s necessary for shelf-life and food safety.
You’ll also notice as we get into our meal lists that a lot of the items included are pre-packaged foods like energy bars and packaged candies and jellies. That’s all good and will save us some time and add calories as we assemble our meals.
So What’s on the Menu?
Breakfast:
- Cereals. This includes things like oatmeal, granola and even cereal blends that you can combine yourself. There are options for how you can eat some of them. Oatmeal will obviously need some hot water to finish so buy the instant oat meal packets. Traditional cereals are good with a powdered milk mix, and you can even eat a cereal like granola out of hand if the morning is hectic.
- Coffee. Most of us can’t imagine breakfast without coffee. Instant coffee is best and if you like it with cream and sugar, you can premix some powdered creamer and sugar with the instant coffee and seal them ahead of time in packets. All you need after that is the hot water.
- Crackers and jelly. You can buy pre-packaged cracker and jelly combinations or just vacuum seal some crackers with one of those small jelly trays or packets you see at restaurants. Try to vary the jelly flavors so succeeding breakfasts have some flavor variety. Vary the cracker types as well.
- Peanut Butter. Peanut butter is a great source of protein and calories. Buy the individual, small peanut butter packets.
- Dried Fruit. This is another traditional breakfast option and you can mix it into your cereal or eat it as a snack on the side. Once again, try to distribute a variety across the days or just load each day with a dry mixed-fruit.
- Powdered beverages. It’s not just about coffee. Think in terms of powdered orange drinks; apple and other flavors that you can mix with cold water. There are also vitamin-fortified powdered drink mixes like Emergen-C that are available in a variety of flavors. That sounds like a real good idea.
- Breakfast Accessories. We’ll always include a Potable Aqua tablet and a hand wipe packet in every meal but other things you could add to your breakfast MRE include extra sugar, a tea bag, powdered milk, toilet paper, and always one multi-vitamin for adults and include one for kids just in case.
Here’s how a sample breakfast menu plan could shape up for your MRE’s.
Breakfast #1:
- Instant oatmeal
- Dried blueberries
- Instant coffee
- Powdered orange juice
- Graham crackers
- Grape jelly
- Powdered milk
- Sugar
- Multivitamin
- Potable aqua
- Hand wipes
- Box of matches
Breakfast #2:
- Customized cereal blend
- Dried strawberries
- Instant coffee
- Powdered hot chocolate
- Wheat crackers
- Mixed fruit jelly
- Powdered milk
- Sugar
- Multivitamin
- Potable aqua
- Hand wipes
Breakfast #3:
- Granola
- Dried raspberries
- Instant coffee
- Powdered Emergen-C
- Saltine crackers
- Strawberry jelly
- Powdered milk
- Sugar
- Multivitamin
- Potable aqua
- Hand wipes
Breakfast #4:
- Instant oatmeal
- Dried apricots
- Instant coffee
- Powdered apple juice
- Graham crackers
- Grape jelly
- Powdered milk
- Sugar
- Multivitamin
- Potable aqua
- Hand wipes
Breakfast #5:
- Granola
- Dried cranberries
- Instant coffee
- Powdered Emergen-C
- Wheat crackers
- Mixed fruit jelly
- Powdered milk
- Sugar
- Multivitamin
- Potabala aqua
- Hand wipes
Breakfast Packaging

When all is said and done you can either vacuum seal all of your items for each breakfast in a plastic bag or a Mylar bag. Mylar is best but plastic is a close second.
The individual items should be vacuum sealed in their own individual plastic bags if you are planning to store your MRE’s for years. Otherwise, you can toss items that are already packaged like instant oatmeal packets or little jelly trays directly into the big vacuum sealed bag. However, while that may be easier it may reduce your shelf-life to months rather than years.
If you’re dehydrating your own fruits and vegetables, or pre-mixing things like instant coffee/powdered creamer/sugar –they should definitely be vacuum sealed in dedicated bags as well.
It all gets down to how long you plan on storing your MRE’s. The longer your storage plans, the more proactive you should be about vacuum sealing individual items.
Long-term storage measured in years should also have oxygen absorbers and/or desiccant packets depending on how sensitive the item is to moisture and oxygen.
For breakfast items it may be wise to include those packets with things like oatmeal, homemade dehydrated fruits and vegetables, and anything else you’re nervous about from a moisture or oxygen standpoint. Don’t overdo it, but stop and think for a moment. You may also have noticed that we added a box of matches to the first breakfast. Those should get you through the rest of the week if you need to start a fire.
As time goes on and you actually sample some of your MRE’s (which you should do from time to time), you may notice that some items are affected by moisture or spoilage. In the future make sure those items have the oxygen absorbers and desiccant packs.
Lunch:

Lunch is actually a little simpler than breakfast because we want to pack lunches that are easy to eat on-the-go. The only prep would require adding water to a powdered drink mix, and if you have water available that’s a simple process.
Just in case water is scarce we’ve included a Potable Aqua tab along with a hand wipe for easy cleanup in the accessory pack.

The packaging rules are the same as for breakfast. If you’ve made your own dried fruits or anything is in paper packaging or it’s out of the package altogether like crackers, make sure you vacuum seal and think about those oxygen absorbers and desiccant packets.
Lunch #1:
- Trail mix
- Raisins
- Crackers
- Peanut butter
- Energy bar
- Powdered grape juice
- Potable aqua
- Hand wipes
Lunch #2:
- Trail mix
- Dried peaches
- Crackers
- Peanut butter
- Energy bar
- Powdered apple juice
- Potable aqua
- Hand wipes
Lunch #3:
- Trail mix
- Dried pineapple
- Crackers
- Peanut butter
- Energy bar
- Powdered lemonade
- Potable aqua
- Hand wipes
Lunch #4:
- Trail mix
- Dried mixed fruit
- Crackers
- Peanut butter
- Energy bar
- Powdered grape juice
- Potable aqua
- Hand wipes
Lunch #5:
- Trail mix
- Dried apples
- Crackers
- Peanut butter
- Energy bar
- Powdered fruit juice
- Potable aqua
- Hand wipes
You can substitute items that require some preparation like powdered soups for winter. Just try to buy individually wrapped, single-servings to make your overall packaging tasks easier.
Dinner:

Dinner is a bit of a challenge although there are backpacking foods designed for long-shelf life that do a pretty good job of delivering well-rounded meals. We’re going to try and recreate some of those ideas.
You could also buy the large backpacking dinner packs and divide them into single servings in their own vacuum sealed bags. Typically, freeze-dried backpacking foods serve 4 or more and the concept of MRE’s has always been single-serve.
Dinner #1:
- Tuna packet
- Dried fruit
- Mixed nuts
- Cookies
- Candy bar
- Tea
- Potable aqua
- Sugar
- Salt & pepper
- Mayonnaise packet
- Hand wipes
Dinner #2:
- Ramen noodles with meat powder and vegetables
- Dried fruit
- Mixed nuts
- Cookies
- Candy bar
- Tea
- Potable aqua
- Sugar
- Salt & pepper
- Hot sauce
- Hand wipes
Dinner #3:
- Instant rice with meat powder and vegetables
- Dried green onions
- Mixed nuts
- Cookies
- Candy bar
- Tea
- Potable aqua
- Sugar
- Salt & pepper
- Soy sauce
- Hand wipes
Dinner #4:
- Salmon packet
- Dried fruit
- Mixed nuts
- Cookies
- Candy bar
- Tea
- Potable aqua
- Sugar
- Salt & pepper
- Honey mustard & mayonnaise pakcet
- Hand wipes
Dinner #5:
- Readi-pasta with tomato-meat powder and vegetables
- Bread sticks
- Mixed nuts
- Cookies
- Candy bar
- Tea
- Potable aqua
- Sugar
- Salt & peper
- Hot sauce
- Hand wipes
Some of the entrees require some preparation with hot water. This is easier if you buy things like instant rice or Readi-pastas that don’t require boiling in water to soften.
Another option we’ve included are seafood choices like tuna and salmon that are packaged in Mylar bags. You can buy them at the grocery store or online, and the best-by dates are usually 3 years out from the date of purchase. Remember as well that best-by dates are not a hard and fast rule and the food will typically not spoil.

The pasta, noodle and rice entrees also call for the addition of meat powders. You can easily make them yourself or buy them. It’s a great way to add protein, flavor and calories to your meals with excellent shelf-life.
Tea is the hot beverage of choice and you can add some variety to the side dishes by varying the types of cookies, nuts, and candy bars. You can substitute any type of food as a side, just make sure they either have an excellent shelf-life or process them yourself to accomplish the same.
Storing Your Homemade MRE’s
Store them where you store your other emergency foods. A cool, dark place like shelves in the basement or a dark closet or pantry are good options. Keep them out of any direct sunlight and at all costs avoid storing them in an attic space.
You could refrigerate or freeze them if you have the space in a second refrigerator/freezer but that’s not required. Storing them in a large bin with a cover on a shelf should work just fine.
Don’t forget about them. It may be a good idea to try one of your homemade MRE’s from time to time. Take one along on a weekend camping trip or just try one for breakfast or lunch one day. Assess how well they have preserved and think about how they taste.
If you detect any problems with rancidity or spoilage, take a good look at all of them and reassess whether you need to remove or replace some items and repackage the whole thing along with those previously packaged items that maintained their integrity.
If you have kids you may also ask one of them to try your homemade MRE. They may have some good suggestions for what they prefer.
It’s Actually Pretty Easy

All you need is a dedicated weekend for some shopping, preparations and packaging. Start by making lists of what you would like to pull together and how many MRE’s you think you might need and for when. You may also want to purchase some MRE’s online to get an idea for how the pros do it.
Before you get started you should brush up on food preservation techniques. Here are some links to basic information that should get you off to a good start:
Like this post? Don’t Forget to Pin It On Pinterest!


