


Water bath canning in a step-by-step tutorial. Use this printable checklist to help you along in your kitchen. Learn how to use your water bath canner, what alternative pots are available, what food can you use in a water bath, and more.
Water bath canning is a great way to learn how to can low-acid food such as peaches, or berries, and make fruit, jams, and pickles. It’s the true definition of canning for the newbie! Tomatoes are a special case. They can be safely water bath canned only if they are acidified by adding bottled lemon juice.
If you are preserving meat or vegetables, you need to go to my pressure canning page.
These are general food canning instructions for the water bath method. Each water bath canning recipe will be a bit different in how the food is prepared for processing. Links to canning recipes are included lower down the page.

This Page Includes:
What is Water Bath Canning?
This kind of canning is when you process jars submerged in a “bath” of boiling water, instead of under pressure like in a pressure canner. The jars are boiled for a certain amount of time dependent on the type of food. And dependent on the altitude or elevation above sea level that you are at. This is important because water boils at different temperatures depending on where you live.
This boiling brings the heat in the jars up to a temperature that will stop spoilage of the food in the jar. As the jars cool the product shrinks and pulls the lid down causing a vacuum seal. The sealing compound on the lids keeps the seal intact and protects the food and keeps the food shelf stable.
The National Center for Home Food Preservation has done extensive testing to determine the proper time that low acid foods need to be safe for storage on the shelf.
Water Bath Canning: Extended, Step-By-Step Directions
Gather Your Canning Supplies: (links will take you to a page with more information on that particular supply.)
Remember when pressure or water bath canning that using fresh, high-quality food makes a better end product.
Preparing Canner and Supplies
Fill your canner about 1/3 full of water. Heat water until hot, not boiling.
If processing time is less than 10 minutes, you will need to sterilize your jars. Most water bath canning recipes call for at least 10 minutes of processing time so all you need to do is have warm, clean jars.
Wash your jars and keep warm. When preparing jars for canning, jars can be washed by hand or in the dishwasher. Make sure your jars are in good condition and do not have cracks or nicks on the rim.
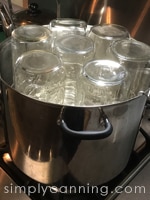
Water Bath Canning – Keep Jars Hot Until Ready to Be Filled
For keeping jars hot, I have three options for you. I listed them in order of my preference. Favorite first!
- Place the jars upside down in the canner that you are already heating up. The steam will warm the jars. This saves space/energy. No extra pot on another burner needed.
- Wash the jars in the dishwasher and then simply leave them there until you’re ready to fill. Keeping the door to the dishwasher closed keeps in the steam and heat. Remove the jars a couple at a time as needed.
- Place the clean jars upside down in a large pot with 2 or 3 inches of hot water. Bring to a boil and turn off heat. Leave the jars in the water until ready to be filled.
Have clean lids on hand. Remember, even in water bath canning, the lids do NOT need to be boiled for sterilization unless you process them for less than 10 minutes. Ten minutes or more processing, then they just need to be clean. I like to have them in a small bowl of hot water on my counter.
Filling the Jars for Water Bath Canning
There are two methods for filling your jars before you put them in the canner.
- Hot packing simply means your food is hot before you put it in the jar. Usually simmer for a few minutes.
- Raw Packing is when the food is not cooked as you put it in the jar. This is also sometimes called a cold pack. This does NOT mean you don’t process the filled jars. It just means the food is raw and uncooked as you pack it.
Prepare and pack food according to food canning instructions in your recipe.
Fill jar, leaving the recommended headspace
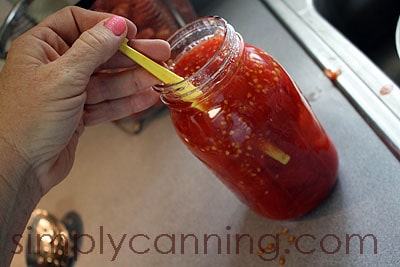
Remove air bubbles by running a non-metallic spatula around the inside of the jar. I like to use a plastic orange peeler for this step. It is small and easily slides down. A small rubber spatula will also work.
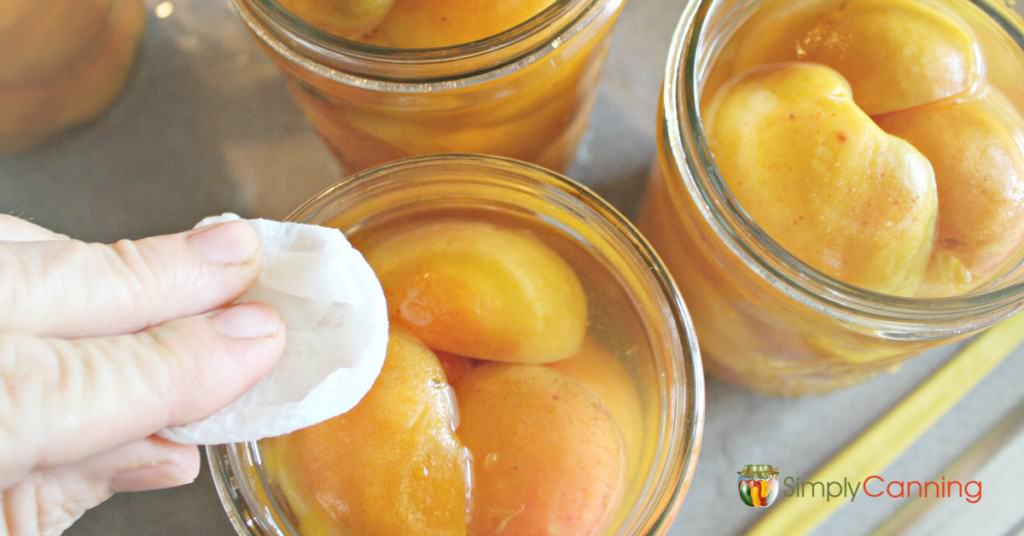
Wipe the rim of the jar clean with a damp tea towel or paper towel.
Place seals and rings on jars. Tighten finger tight. You really don’t have to crank down hard; snug is fine.
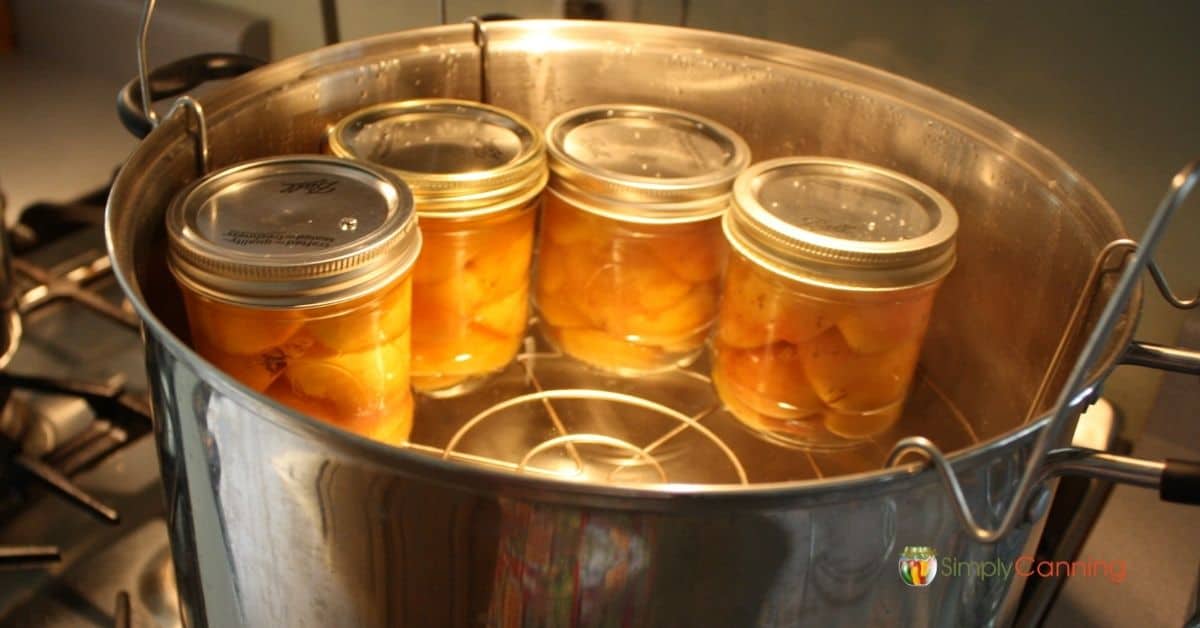
Place jars upright on the rack in the canner. The rack will keep your jars off the bottom and will also keep them from hitting each other.
The rack should be built so that it rests on the sides of the canner, keeping the jars above the water until you have it loaded and then you can lower it down. The picture shows the jars lowered into the canner.
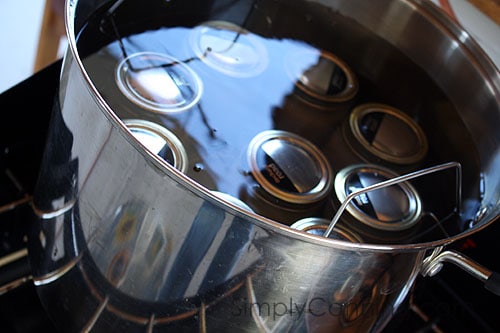
Water needs to flow freely around each jar. Add hot water if needed until the jars are covered by 2 inches of water.
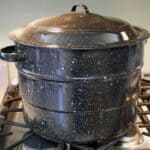
You can also process jars in any pot deep enough to have jars fully covered in boiling water. You will need to put something under the jars to keep them off the bottom. A neighbor of mine uses a small piece of board. I’ve also heard of using a hand towel. Water bath canners are not too expensive, so it may be worth it to just get one.
Processing Food in the Water Bath Canner
When you are water bath canning, you don’t start your time until the canner comes back to a boil.
Cover and return to a full boil. NOW start your timer, being sure to adjust for altitude.
Check occasionally to be sure that the canner is maintaining a full boil. You may also need to add boiling water to keep the water level up.
When your time is up, turn off the heat.
Carefully raise the rack and jars up. Wait a minute or two before you take your jars out of the canner.
Using a jar lifter, carefully remove the jars and set upright on a wooden board or a thick towel to cool. Be sure they are in a draft-free area and leave 1 to 2 inches of space in between so air can circulate.
I have butcher block in my kitchen, so I simply set them there to cool.
Listen…
Did you hear it?? This is my favorite part. As the jars cool, the seals (or flats) will pull down and seal. They make the coolest little pinging sound. For some odd reason, I love that sound. It is so satisfying. It means all my work is working! Water bath canning is so easy!
Resist the temptation to press the lids at this point. If your kids are like mine, keep them away too! ? Leave the jars alone until cool, preferably allowing them to sit undisturbed for 12-24 hours.
Cooling Down, Checking the Seals, & Storage
After jars have cooled, NOW you may press on the lid to check the seal. The seal should be sucked down and not pop up. If you find a jar that did not seal, simply put the jar in the fridge and plan on using the food within a few days.
Remove the screw cap and wash the jar. The outsides will often be sticky. It is a good idea (but not essential) to store without the screw cap.
Sometimes the screw cap will rust if you leave them on. If you have one that is stuck, don’t force it–you may break the seal. Just go ahead and store it with the screw cap in place.
Label the jar with the food type and date.
You may think that labeling the type of food isn’t necessary if you can obviously see it is canned pears. However, what if you are canning applesauce using different types of apples for each batch? You will want to know which is which when you open them later. You can then decide which you like better for next time.
For example, from experience, my family knows that Jona-gold apples are our favorites for the BEST applesauce (in our humble opinion).
Always record a date, at least the year. That way, when you find a jar waaaay back in your cupboard, you will know how old it is. You think you will keep them straight, but it is so easy to forget and so easy to label them now. Trust me. Just do it.
Store your jars in a cool, dark, dry environment. Usually a pantry is fine. Don’t store in a utility room where there are hot pipes or high humidity. Direct sunlight is a no-no as well.
You’ve Finished Water Bath Canning!
Now stand back and admire the colorful, gleaming jars of nutritious foods ready for your family.
Water bath canning is so easy!
What? You are tired?! Yes, but it is a satisfying tired, is it not?
Printable Checklist
Water Bath Canning
Water bath canning is for high-acid foods like fruit, jam or jellies, and safe tested pickled items. A water bath is the perfect place for a beginner to get comfortable with home cannng.
Yield: 1 varies
Instructions
-
Fill your canner about half full of water. Start heating it up. The goal is for the canner to be hot but not boiling as you are filling your jars. You want enough water to cover your jars when they are filled and in the canner. Have a teapot of hot water available in case you need to top it off.
-
Wash and rinse your jars and lids. (They do not need to be sterilized.) Keep your jars hot until use. The best way is to place them in the canner rack raised above the water while it heats up.
-
Prepare and fill jars according to the canning directions for that food. Remember proper headspace, removing bubbles if needed, wipe down the rims of your jars, and put on the lids and rings.
-
Place the filled jars in the canner. Continue until all jars are filled.
-
Lower the jars into the water; if needed, add hot water so the jars are covered by about 2 inches. Put your lid on the canner and raise your heat and bring to a boil.
-
When your water is at a rolling boil, start your processing time at that point. The proper processing time for your altitude will be given in your recipe. Different altitudes will have different times. The higher you live, the longer you process. Make sure the water remains above the level of the jars. Add hot water as needed.
-
When the processing time is completed, turn off the heat. Open the lid to allow steam to escape. (Carefully, don’t let it hit your face or arms!) Wait 5 minutes. Raise the rack and jars above the water. Allow them to rest another 5 minutes. Now remove your jars. (Optionally, you can wait another 5 minutes if the contents appear to be bubbling so hard it is coming out of the jars.)
-
Put the jars on a counter with a thick towel beneath them to protect the hot jar from the cool counter. Allow them to cool to room temperature undisturbed. 12 hours is suggested. Do not try to speed up the cooling process.
-
When they are cool, remove the metal bands, check the seals, and store the jars in a cool, dark place.
Notes
Last updated: 10/29/2021
Water Bath Canning Works for What Canning Recipes?
Water Bath Canning Tips & FAQs
One of the most often questions I receive is about the pot itself. I do recommend getting a specialized canning pot. There are inexpensive options to get you started, and they make it much easier. However, the good news is; you can get started with any deep pot.
Check out this page for more information on the canners I recommend and some alternatives: Water Bath Canners.
Have you heard of steam canning yet? It is a great alternative processing method to replace water bath canning. It uses less water and less time, and I love it. If you haven’t, please, oh, please, check out this page. How to use a steam canner.
You don’t have to have the lid on the canner but it is a good idea to do so. Keeping the lid on will maintain the heat better. You will need to keep the canner at a rolling boil for the entire processing time. Having the lid will make heating the water to boiling quicker and more fuel efficient.
Answer: Occasionally, a canning jar may break during processing. If this is discovered when you take the jars out of the water bath canner after processing, carefully remove the broken jar and its contents.
It is less likely, but if you suddenly see fruit (or whatever food you are canning at the time) floating around in your canner during the processing time, you’ll know a jar broke. You can go ahead and fish out any big pieces that you can get at and still let the processing time finish for your other jars. Careful! It is hot!
Either way, be sure you are careful when you empty your canner of the water. Usually a jar simply cracks and there are no small pieces, but…just in case, be watchful for small glass pieces.
Being careful to not expose the jars to extreme temperature changes during canning is the best preventative for jars breaking, as is using a proper rack or something on the bottom of the canner to prevent jars from bouncing around in the water.
Related Pages
Learn about the different types of water bath canners on this page! Get all of the details here.
Canning pie filling – whether apple or cherry or peach – can be a challenge to master. Learn SimplyCanning.com’s top 5 tips and tricks to make the perfect filling, every time!
Canning apricot is safe for a water bath due to the high acidity. In this tutorial, SimplyCanning.com shows you how easy it is to can apricots. Recipes included for light and heavy syrup too!
Pin This to Find Later!
Page last updated: 10/29/2021