Estimated reading time: 13 minutes
Whether you’re preparing for an economic collapse, an earthquake, a hurricane, or an extended grid down scenario, there are a multitude of reasons to prepare for bugging out of your town if you have to.
One of the most vital parts of preparing for a bug out scenario, regardless of the incident that causes it, is to prepare an adequate bug out bag. The purpose of your bug out bag is simple: to keep you alive for a 72 hour period as you get out of dodge.
But at the same time, a bug out bag is more than just a backpack with a few random survival items stuffed in there. Putting a good bug out bag together requires careful planning and strategic thinking, and it’s easy to overlook a few significant factors that can greatly impact whether your bug out bag actually helps you stay alive or not.
With that said, here are a few bug out bag tips and tricks that may surprise you…but that could also end up saving your life in the end.
Want to save this post for later? Click Here to Pin It On Pinterest!
1. Have a Journal Detailing Your Items

One of the most underestimated items to include in any bug out bag is a small journal or notepad and a writing utensil.
While most of your journal should be left blank so you have plenty of space to write down notes or to document your survival efforts in a diary-like format, you should dedicate a few pages to writing down each of the items you have in your bag and the quantity for each in a list format.
The purpose of this is simply for organizational purposes and to keep track of everything in your bug out bag. Then when you go through your bag again later (like we’ll discuss in a bit) you can use your list as a reference point.
2. Compartmentalize the Bag

Going with a duffel-style bag for your bug out bag will be a major mistake. This is a surefire way for items to get lost or severely disorganized.
Instead, go with a bug out bag that has multiple compartments. This will make your items much more easily accessible and also make it much easier to organize your bag. Ideally, your backpack will have one major compartment to store the larger and less urgent items, and then a variety of smaller pockets and pouches on the outside to store smaller and more urgent items that you can more readily access.
3. Make Sure the Most Urgent and Important Items Are Easily Accessible
You want to be very strategic about how you pack your bug out bag. Going with a bag that has multiple pockets and compartments like we just discussed is a major plus, and as part of that, you want to make sure that your most urgent items are stored on top in the most easily accessible pockets.
Think of the survival items that you would need to access quickly if needed, such as your knife, fire starting materials, or a first aid kit. These are the kinds of items that you don’t want to be rummaging around in your pack wasting valuable time trying to find.
4. Keep Smaller Pouches In Your Pouch

This tip builds off of the last ones. You can purchase smaller pouches that can each hold a collection of similar items and then stash those pouches in your bug out bag.
For example, you don’t want each of your first aid items to be stored separately and loosely in your bag. Instead, buy a pouch that serves as your first aid pouch with all of your first aid items stored in that pouch.
Have another pouch that stores all of your fire-starting items, including your lighters, magnesium flint strikers, matches, Vaseline and cotton balls, and kindling..
You get the idea. Having pouches that store related items together will help keep everything organized and also ensure that these items are more accessible.
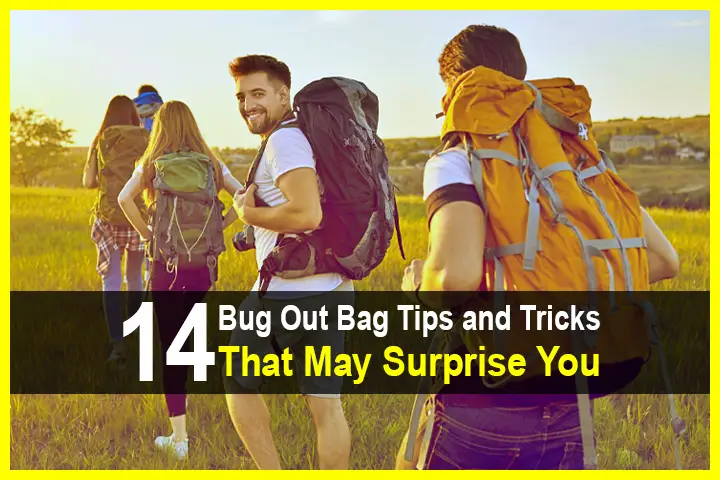
5. Make Sure The Bug Out Bag Has A Neutral Color

You don’t just want to be strategic about how well organized your bug out bag is. You also want to be strategic about its appearance. Don’t pick a bug out bag that has your ‘favorite color.’ Instead, think carefully about your environment and go with a bag that will
To this end, avoid going with a bug out bag that has bright and easy-to-spot colors such as light blue, orange, yellow, pink, or red. Each of these colors will easily stand out in virtually any environment, meaning you can be easily detected when you need to be hidden (whether it’s in a forest or in an urban environment).
Instead, you want a bug out bag that has more muted colors such as black, gray, brown, dark blue, or dark green. These colors are less easily visible and will help you blend in with your surrounding environment more easily, therefore making you less of a target.
6. Look Through Your Bug Out Bag Once Per Month

Many people make the mistake of putting a complete bug out bag together only to forget about it later. As a result, it’s easy for them to forget about the individual items they had stored in there, which can be detrimental when a real bug out scenario occurs.
It’s absolutely important for you to remember each item that you store in your bug out bag and know where it’s been placed so you can quickly access it in a jiffy if need be.
This is why you should make it a routine to go through your bug out bag at least once per month. Take everything out of the bag to refamiliarize yourself with everything you have in it, and then place it back into your bag. This will help your brain memorize everything you have in your bag and where it’s at, and the more times you do it, the easier it will be to remember.
7. Carry A Manageable Amount of Water

Water is critical for survival, but it’s also heavy. This is why you want to be strategic about how much water you carry as part of your bug out bag. A good rule of thumb is to carry two liters of water in your bug out bag. This will be enough water to keep you hydrated during a three day period while also being relatively lightweight and easy to carry.
Besides water, remember to include a good portable water filter (such as the LifeStraw or something similar) and water purification tablets as well.
8. Pack a Custom First Aid Kit

Too many people make the mistake of purchasing a first aid kit they find at the local sporting goods store and then stashing it away in their bug out bags without second thoughts. This is a big mistake because it means you won’t be familiar with the first aid items you have, and your first aid kit should contain some of the most important items in your bug out bag’s inventory.
Instead, put together a custom first aid kit. Purchase a separate pouch that will serve as your first aid pouch (like we were talking about previously), make a complete list of all the items you plan on storing in your first aid kit, and then buy those items separately. This will again help you to remember each first aid item that you have in your bag.
As with your bug out bag itself, try to pack and unpack your first aid kit at least once per month so you can ensure you are always fully familiar with its contents.
9. Include A Quick Way To Make Fire

Most people understand the value of including fire starting materials (such as matches or a magnesium flint striker) in their bug out bag. But far fewer understand the importance of including materials to ensure you can get a fire started quickly if you had to.
This is why you don’t just want to carry fire starting devices such as flint strikers or matches or lighters in your bag, you also want to have items that are highly flammable so getting a small fire going won’t be too big of a problem.
One of the best options is to include Vaseline-covered cotton balls in a separate ziploc bag. Vaseline-covered cotton balls can get a flame going from little more than a spark.
10. Don’t Pack Too Many Clothes

Like water, extra clothing is another necessary item that can become very heavy. Just remember that you’re not going on vacation when you’re bugging out, so you don’t need to overdo it here. An extra set of clothing should be sufficient to get you through three days.
Specifically, an extra shirt, pants, underwear, and pair of socks should suffice. The idea is that if the clothing you have on gets soaked in water or severely torn, you have backup clothing that you can put on.
Additionally, plan on including a lightweight jacket, a pair of gloves, and a warm hat as well. The hat will help keep you warm at night, the gloves will also serve the same purpose and help protect your hands in certain situations (such as if you need to climb over barbed wire), and the jacket should be a given.
11. Use A Chest Strap

A bug out bag that comes with a chest strap will always be easier to carry, because part of the weight of the bag is transferred to your chest instead of all being on your hips and your shoulders. It also helps ensure your shoulder straps remain in place so they won’t slide off the ends of your shoulders. The tighter the chest strap is, the more weight will be taken away from your shoulders.
12. Pack a Tarp Instead of a Tent

You always want to pack a good shelter item in your bug out bag to protect yourself from the elements while you’re trying to sleep. It’s a common trend to carry tents in bug out bags, but an even better idea would be to carry a good tarp along with a paracord.
The reason for this is simple: not only is a tarp more lightweight than most tents, it’s also far more useful. You can use your tarp to help signal for rescue, to use as a makeshift stretcher in the event that another member of your party is injured or falls ill, and to collect rainwater.
13. Know How To Fix Your Bug Out Bag

What would you do if your bug out bag gets torn or ripped while you’re on the move? The last thing you’d want is for it to get a big hole or a torn strap that you can’t fix.
Be sure to include a good backpack repair kit, along with duct tape. Familiarize yourself with the contents of the kit and practice your sewing and mending skills on torn garments. You never want a bug out to be the first time you have to put your mending skills to the test.
14. Make Sure Your Bug Out Bag Is Quiet

This is probably the most overlooked tip of all when it comes to packing a bug out bag, but you want to make sure it’s quiet and doesn’t make much noise when you’re moving around. Think twice of storing metal items next to one another, for instance, so they don’t clang together while you’re walking or running.
Conclusion
The above tips and tricks we’ve covered here today are commonly overlooked by novice preppers when putting together their bug out bags. By following these tips you can avoid making the mistakes those new preppers may be making.
Just remember that your bug out bag is meant to be personalized and tailored to you, depending on your needs and the environment you’re likely to find yourself in. Besides the above tips we’ve covered, think carefully and ask other trusted people you know if there’s any other way you can modify or tailor your bug out bag based on those needs and environment. There’s likely a few more ways you can upgrade your bug out bag beyond what we’ve covered here today.
Like this post? Don’t Forget to Pin It On Pinterest!


