


…would be dandy this time of year, wouldn’t it? I mean, a glass of hot spiced wine – maybe a hot Apple Jack…fire going to keep the chill off? Yeah, that’d be the way to spend fall. Portable radio. Football game on…
Well, except, there’s one problem: We don’t have a patio.
As luck would have it, we were having exactly this conversation a week ago Friday at cocktail hour in the 180-degree view porch.
“Yes, I think that would be nice. Don’t know how much we would use it, but it could be interesting,” decided Elaine.
“Hand me the phone, dear. Watch me make a call. Let’s get this project rolling.”
Five minutes (and $250 on a credit card later) the local Lowes promised it would be ready Saturday morning at 8 AM sharp.
A load of patio pavers on a pallet. Which it was.
It did take the Lowes crew a few minutes to get the loading right with a forklift. 160. of those 12-inch square pavers, does weigh a little something. They had to push the load as far to the front of the bed it would go. Because we kept bottoming out on the rear axle.
All the way home, worries were spinning through my head. “If I have a flat tire with this load, do I call Denson or Mattern Tire and make it their problem?”
Getting…er…Laid
This turned out to be the easy part…”Hey Elaine, come here for a minute, would you, Hun!”

She did a fine job of supervising (and moving pavers off the truck pile and onto the tailgate where her pet gorilla (me) got laid for a couple of hours!
When you put in your own version of this latest construction debacle, remember that the books and “how-to” people who write lengthy books and produce “windy videos” make far too big a deal about leveling pavers.
Yes, it’s nice if you put down 3? of sand under everything, roll it out, water and then level that. But over a few winters, Nature will make it all back to wavy and crooked anyway. So, don’t get carried away with finessing this. Just get the damn job done.
My buddy (The Major and Mrs. Major Doctor) just paid a small fortune (read: kilobucks) to replace all of their 20-year-old patio. It had settled. They all do. Just put it in, give it a couple of years, buy sand, hire some “arm-strong for labor” and level it later. Really.
We didn’t use all 160 of the pavers – there were a few left over for the generator shed. Which is envisioned as a pad with pavers for the genset to sit on and a lift-up pop-off top. The front will be mostly open, but that’s another project for another weekend story time…
Meanwhile, back to trucking through the paver patio project.

Can you imagine this old farm truck with six more layers of pavers on it having a flat tire? Buy eight ply rated tires for your truck!
Useful Construction Math Tip
My wife weighs less than a cubic foot of concrete.
That’s one way I remember that concrete weighs (depending on mix) about 130 pounds per cubic foot.
Six of the 12X12 blocks which are 2 inches thick is a cubic foot’s worth. Which (for 160 of ’em) is 26.66 times 130. Amazingly, the old farm truck hauled how much weight? 3,465 lbs. plus or minus air gaps, pallet weight, my weight, and 3/4ths of a tank of gas. Not bad for a “half ton” truck, huh? But it explained the bottoming on the rear axle, while loading, I suppose.
Recycled Materials Use
 It really bothered us – when we took down the old 20×20 foot front deck (which had become questionable over 15-20 years in the sunshine) to toss it on the burn pile.
With the BBQ deck rebuild we did better.
Saved the old decking and reused it. We wanted this patio project to be somewhat fenced in, to look a little cozier, to hold a stove, a place to store wood (*with no snakes!) and where the feral/barn cats could hang out.
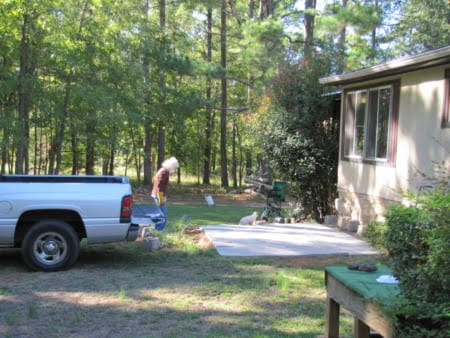
Here, for example, Princess Elaine holds up a 62-inch piece of 5/4 decking that has previously done 12-years service holding up the BBQ deck. With that wood updated, a “weathered fence look” would be achieved with absolutely zero effort which is how we like to roll. Well, one of us. OSHA inspecting blondes are…uh…different.
The Fence Takes Shape
The old (20×20-foot) deck on the front of the house had also been held up by almost uncountable pier blocks. Which was great because they happen to have a 12 x 12-inch footprint. (*Sometimes you will get lucky in Life! We would have preferred a Power Ball winner, though. But you take what Universe dishes out, I suppose…)

With the rustic patio “roughed in” the next step was positioning the pier blocks where 4 by 4 posts would hold up the fence.
Firehouse Fence Secrets
As a son of a firefighter (and father of one, too) – they’re the hardest working and generally also smartest working people around – there were multiple reasons why this was a two- half-day – project for us.
- Secret #1: Always pace your work. (Most people don’t know this, but firefighters have a rule – no one runs on the fire ground!) Same thing in off-shift construction. Work hard – really, really hard – really smart – and then knock off. The name of the game is to get the job done, not die trying. Getting the blocks down was the first half day. Toss in the trip to town and the OSHA inspector (aforementioned princess) let me slide with a 10-hour day. (Remember, there were several hours on last week’s Peoplenomics done before all this paver stonework!)
- Second Secret: Using scrap wood, always build a level line around the top you can measure from. We never assumed this would be a dead-to-nuts level patio. Because at our age, we are at risk of not being able to use it for as many hours as we could put into it! Remember, you want to get a positive return – and we like 100 to 1 (or more) return rates if we can find them. Using this twisted (but obviously logical) view, an 8-hour project should give you 800 hours of use/enjoyment/pleasure when complete. Take your time shopping for your next recliner!
- Secret #3 is “Corners Add Strength to Design.” Believe me when I tell you this: The shorter runs of fence and the more “effective depth of structure” the stronger the fence is going to be. Think of it this way. A single row of fencing, say 12 feet long, if just poked into the ground, will be a God-awful 3-day nightmare of footings and concrete work. Because a 5-foot high fence of that length will be a 60-square foot wind sail. It will just be looking to blow over in the first good storm that comes along. But add some “effective depth” to the design, like 6-foot T sections off either end, and now you can endure hurricanes. Seeing how this works? Yes, we have long straight fencing (this is a tree ranch, after all, lol). But there’s less “wind sail” from a quarter mile of 4-point barbed than there is a single standard 4×8 sheet of plywood. Even so, we use only (slightly heavier) T-rated (transportation department approved stronger fence posts to keep animals in and off public highways) most times.
- And then Secret #4 to fencing is the wise use of Gauge Blocks. Once you (and the helper) get the top run of fencing rails in, put away your measuring tape. This secret sauce will save oodles of time. This is going to take us on a little detour…
Gauge blocks are for what? Spaces between your fence boards.
How to build a gauge block
Think through your fence. We want to see over ours, if we sit up, real tall, and so we didn’t want a solid fence, something we can see through. Four runs of the recycled decking sounded about right, based on materials on hand…
Numbers to make the Gauge Blocks:
- Width of material: 5 1/2?
- Number of horizontal pieces: 4
- Overall height desired: 40-inches
I set this up in a spreadsheet so you can use it:

This remembers that the spaces is your total horizontal runs of material minus 1. Accordingly, 8 rows will have 7 spaces, 20 rows will have 19. And so forth.
If you want the Excel file? ShopTalkGaugeBlocks (.xlsx)
With this in mind, old numb nuts goes into the shop and cuts (2) six inch hunks of scrap and cuts them to exactly 6-inches:

Making Quick Work of Things
There was a little measuring to tossing up the top fence rails. Use scrap for bracing then you get one set on (the top). Level as you can. Then you “squeeze clamp” the gauge blocks, one on either post, under the top rail. Now hold the next rail up against the blocks with one hand while screwing it in with the other. See why I pre-start the screws? Faster than greased lightning. Less back strain.
Even so, my back hurt like hell…old age does slow my construction speed a bit. (Pisses me off.) On the other hand, this really is one of those “old men resort to treachery and “secrets” collected over a whole lot of years...”

Notice the outset area (62? inches wide, middle left) will be where the small tent-sized wood stove will go. We have a bigger one that could go in as an option. Let’s see how much use it gets in the real world, first, and if cold is the issue. Not rain, snow, and hazards like that.
The angle areas will have pieces of wood added so the cats can play King of the Mountain. And we deferred to the Purdue University Extension Service advisory on spacing of wood stoves out from walls here: FNR-100 (purdue.edu).
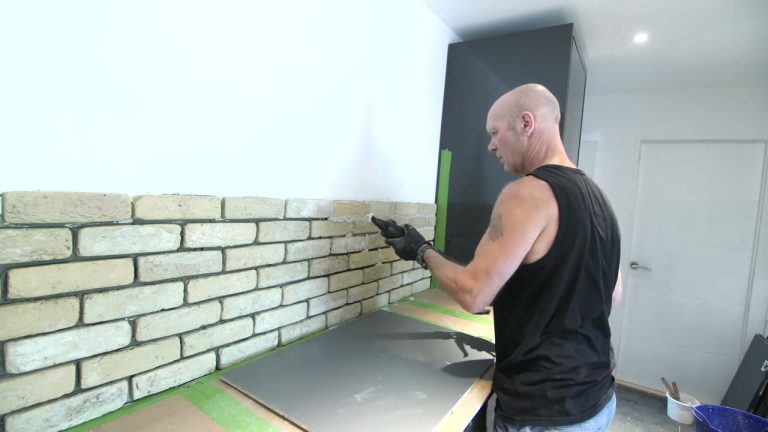
As luck would have it, from the long-ago kitchen tile adventure and other works of wonder around here, we have a couple of sheets of cementitious board that is just the right length for the “back of stove” area. It will be spaced 1-inch out on aluminum spacers. Which should make it very safe.
Why, if this area gets anymore over-engineered, I’ll pop a pergola roof frame over it and then lay a roof on it. Hell, then sidewalls, windows, and insulation and we’ll have a rustic cabin… Always one thing leading to another, ain’t it?
Now, as for how the look of it came out. About like this:
 Less all the accessories, of course. Like the stock, wood pile, chairs….and booze….
We will get the “finishings” over the next week or so. The concrete board up, the cat perches, the covered wood area, and the stove with chimney cables, and a chair or three.
The area on the (fairly fresh dirt) slopes will be dusted an inch thick, or so, with Portland Cement, and then watered in. Which will produce a tough crust (like terra-crete). In the spring, I will come up with some wood planters (deep so roots don’t fry in summer) and we will put some greenage around the place.
That reminds me, I will have to make a run to the booze store this week. Getting on time to lay in a stock of Apple Jack. Winter’s out there, somewhere.
Three for the Road
The first (another firehouse takeaway) is “When doing construction, carry a marble.” When you are leveling something (like the stainless table that the tent stove will sit on) a simple marble will tell you more about leveling than a bubble level any day of the week.
Sidebar: Why the Masons don’t have marbles in their symbols has always been a wonderment for me to ponder… I would sure like to know which Grand Lodge Warden to write to seeking the “Modern Mason’s Marble Manual” writing contract. OK, so it doesn’t have the same panache as “Part on the Square” or
“Keeping things on the level.” Still, “Don’t lose your marbles has potential, know what I mean? For now, I’ll just take pride my leveling marbles rolling slowly east…with no time for meetings…
Second point is keep everything for fire-making right at hand. I built up a “wood rick” (the base of which is the paver pallet cut down to size) to keep a supply of firewood at hand. Remember where that came from? Go back and connect the dots by rereading This week a further discussion of using drones around our tree farm in last week’s STS column.
This includes a large (cheap) “fire kit” box. Any cheapo tool box so long as it’s big and plastic. A dozen (or three) fire-starters (sawdust and wax kind – whatever is cheap!). A half-dozen propane lighters. Altoid box full of char cloth. Fire steel for the End of the World. A good hatchet. A fire (or two) worth of pre bundled 10-inch kindling to toss on the fire starter.
One of the biggest obstacles to outdoor fire/BBQing and cooking in the winter months is the “screw-around factor” of lining up all the shit needed and going through the checklist. “Where’s the lighter? Got any newspaper? Anything around we can use for kindling?” You know the drill.
Final hint of the three: Clean out surrounding gutters of your house before the arrival of monsoons. Two reasons I did this yesterday. The first was that we will be “test firing” the whole Megillah later this morning and our gutters had some very dry (read: flammable) goo down in them. Pine straw and a few leaves.
The second reason is that at the end of last year’s rainy season there were enough leaves and debris that a couple of the gutters were overflowing before getting to the downspouts. Much easier work when it’s warm out.
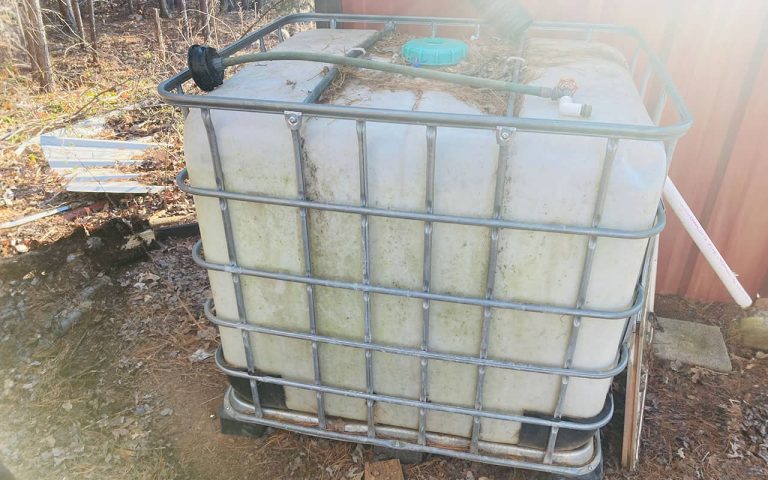
Last – and related – is the gutter on the greenhouse (lean to, a long ago project you can read about in inexpensive Chinese “parking heaters.” These are similar to the Webasto and Espar units that have kept truckers warm for decades. Thing is, these are about 1/1oth the price. See more at https://urbansurvival.com/shoptalk-sunday-greenhouse-chinese-diesel-heater-install/). This is also a good time to clean the filters on the rain barrels…
It all sort of flows together around here. If you keep tabs on your home’s evolution at a glacial time scale, that is…
Write when you get rich,
George@Ure.net