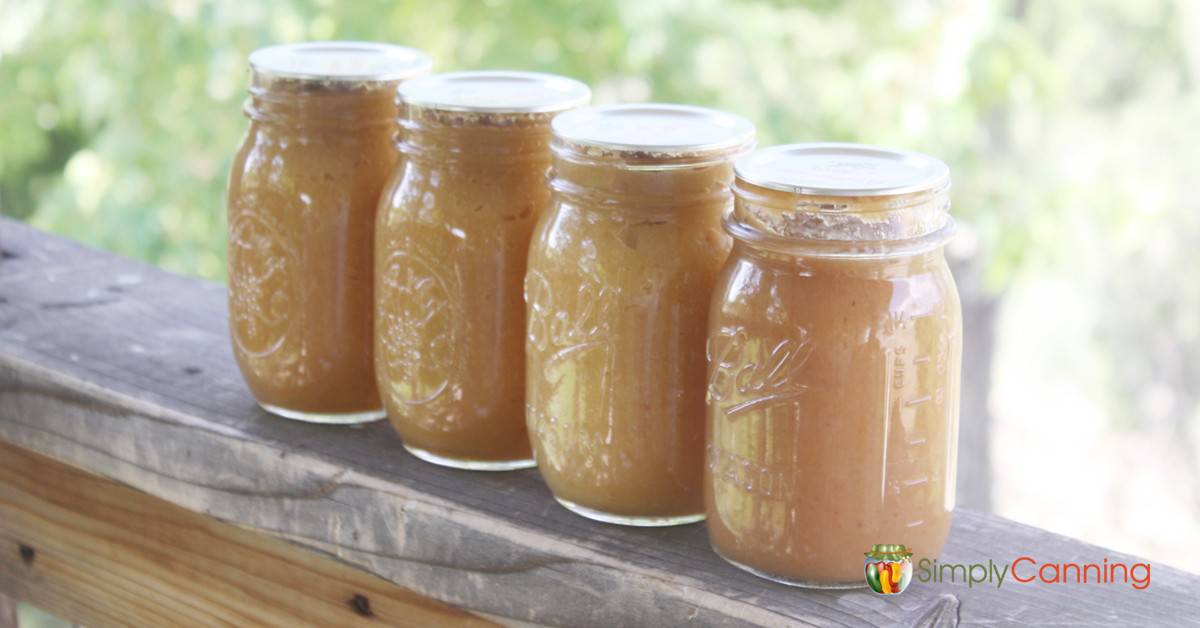
What kind of apples are best for canning applesauce? Maybe you like extra sweet or extra tart? Using several types of apples will give your applesauce a nicer flavor. A favorite of ours is Jona-Gold. You might want to experiment and see what combinations will do for your family. Honestly any apple variety will work.
How to make applesauce; peel and cook the apples, mush them up, and add sweetener if desired, getting rid of the skins and cores somewhere along the way. Process for storage on the shelf. It’s pretty easy. I’ve tips to make each step easy as you work.
Know Your Canner
When canning applesauce, you may process in a water bath canner or a steam canner.
If you’re not yet acquainted with water bath canning or steam canning, please review these articles first.”How to Use a Water Bath Canner” and “How to Use a Steam Canner.” These articles are guides that will introduce you to both methods and provide step-by-step instructions for setting up your canning project.
Canning Applesauce Recipe: Extended, Step-By-Step Directions
Gather your canning supplies and ingredients.
- apples (you will need about 21 pounds per canner load of 7 quarts)
- sugar, to taste
- cinnamon (optional, a nice addition)
How to make applesauce for canning.
The first thing you’ll need to do is make your applesauce. There are 2 ways to do this. Use a food mill or just peel and cook your apples.
- If you have a food mill you will cook the apples before getting rid of the skin and cores. The mill does the work of peeling and coring.
- If you do not have one, then you must peel and core apples by hand prior to cooking. An apple slicer comes in handy here.
Making applesauce with a food mill.
If you have a food mill, it makes things very easy.
Wash and quarter apples. Place in large pot (approx. 5-6 quarts in size).
Don’t overfill your pot as you need to be able to stir the apples even before they have softened. Otherwise, they will stick. (Ask me how I know!) I have two pots that I will sometimes get going at the same time.
Once (and only once!) I tried to cook all my apples at once in a huge stock pot that I have. Big mistake. I could not get the apples up off the bottom of the pot very well. So they scorched! I rescued the apples off the top and continued. Sometimes, we can try to save time, but only make more problems.
Add 1/2 to 1 cup water to help prevent sticking. Cover and simmer until tender, stirring often. At first, stirring is just a matter of pulling the apple pieces up off the bottom every now and again. As it cooks it will soften and it gets easier.
Press your cooked apples through your food mill. If you are canning applesauce with a red-skinned variety of apple, it will pick up the color. Pink, gorgeous, and appetizing.
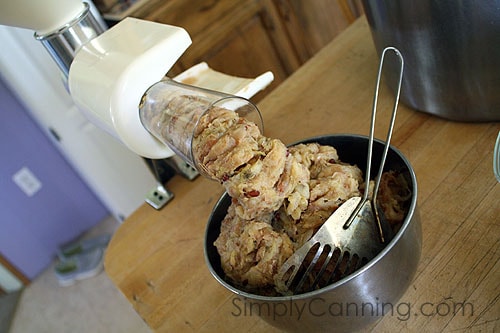
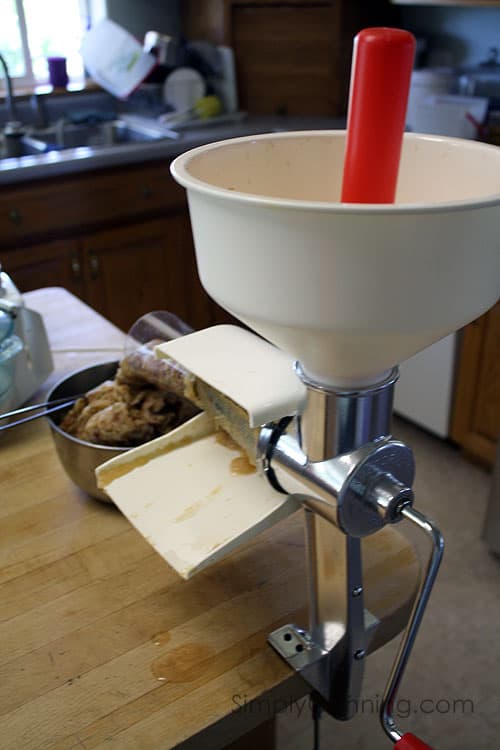
I use my Victorio Food Mill. Put the cooked apples–skins, cores, and all–into the hopper, press down as you turn the crank, and the skins will be pushed out the end while your applesauce will emerge from the strainer.
Making applesauce by peeling and cooking.
If you don’t have a food mill, you just need to peel and core your apples before cooking.
Peel, core, and quarter apples.
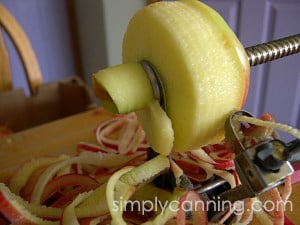
This is where the apple peeler-corer-slicer comes in handy. It will cut your time in half. If you use one, see instructions that came with it. Otherwise, just peel, core, and slice the old-fashioned way with a paring knife.
Tip: Thinner slices will soften much faster.
Place slices in a large pot adding 1/2 to 1 cup water to prevent sticking.
Cook until tender, stirring often.
Mash with a potato masher. This works well if you like a chunky applesauce. If desired, you can use a wire whisk on the apples at the end of cooking to get a smoother consistency. You can also try an immersion blender but be careful with that. You don’t want to over blend and end up with it being more like juice.
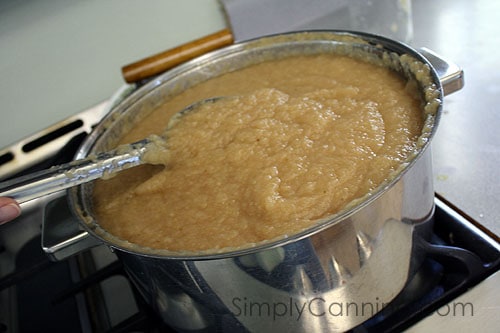
Add sugar to resulting applesauce to taste. I prefer not to put any sugar, but it all depends on the type of apple. Go ahead and taste it and add sugar if you want. Cinnamon is another option. (I’ve got more below on both sugar and lemon juice in applesauce.)
Canning Homemade Applesauce
Now that you have your sauce, using whichever method you chose to make it, you’ll proceed to fill the jars and begin the processing.
Filling the jars.
Reheat sauce to a boil, again stirring often to prevent sticking.
Fill hot jars with hot, homemade applesauce, leaving 1/2-inch headspace.
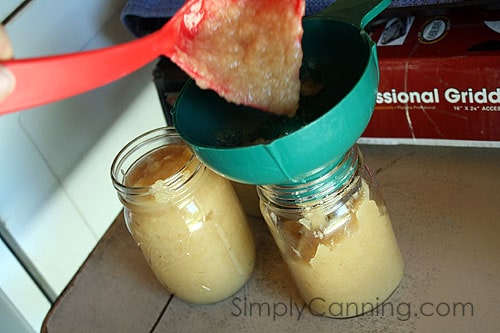
Wipe the rims clean, remove any air bubbles, and place your lids. For more details, follow water bath canning instructions.
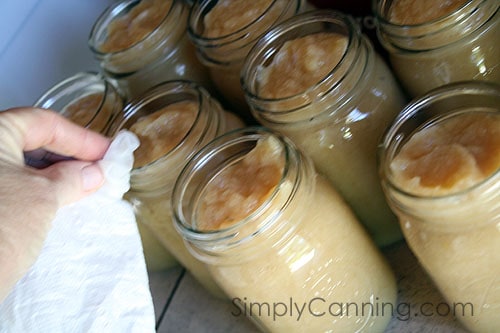
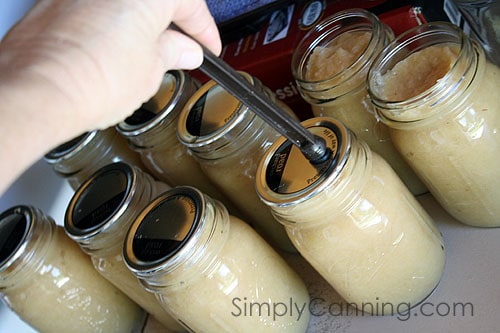
Process in a water bath.
The final step is processing. You can use a water bath canner or a steam canner. It is important to use the correct time for your altitude. See the chart below to determine your processing time.
When all the jars are filled and in the hot canner, bring the water in the canner back to a boil. When a boil is reached that is when you’ll start your timing.
This should be a full rolling boil, but it does not need to be bubbling so hard it is splashing out of the canner. Make sure bubbles are happening, and the water is rolling.
Process for the length of time on the chart below. Adjust for your altitude. For more information on altitude adjustments and why they are important.
Cool down time.
After your time is over you’ll want to allow the jars to cool to room temperature.
- Turn the heat off remove the lid and allow the canner to rest for about 5 minutes.
- Bring the jars on the rack up out of the water. Allow them to rest for another 5 minutes.
- Finally, remove the jars and place them a few inches apart on a thick towel to cool completely.
Do not press the lid during this time, don’t put fans on the jars to hurry the cooling time along. Just set them out and leave them alone.
This gradual cooldown in the canner helps reduce siphoning or liquid loss in your jars. Applesauce is known for swelling and siphoning during processing. They will still be extremely hot when you take them out. However if you notice bubbling around the seals or applesauce even squeezing out, wait a little more time.
This does not mean leave the jars in the canner for hours. You do still need to get them cooled, but don’t rush it too much.
Leave the jars on the counter for about 12 hours. When they are cooled to room temperature, remove the metal bands, check the seals. You may need to wash the jars off. Label the jars and store them away!
NCHFP and Ball Applesauce Recipe Comparison.
The basic recipes from The National Center for Home Food Preservation and the Ball applesauce recipes are very similar, but there are 2 noticeable differences. Lemon juice, and sugar content.
How much sugar do you need in your applesauce?
The good news is.. you get to choose how much sugar to use. Or not. It’s optional. Ball and the NCHFP have different recommendations.
- Ball Canning Recipe recommends using 1 3/4 to 2 1/2 cups of sugar for canning 3 quarts of applesauce.
- NCHFP Canning Recipe suggests using 1/8 cup of sugar per quart as a standard guideline. But the also mention that you can leave out the sugar altogether if you prefer.
Consider your preferences for sweetness and the type of apples you are working with. The best way to do this is on a batch by batch basis. Your apples will vary in sweetness by type of apple, and even by ripeness. Greener apples will be less sweet. Make the applesauce, taste it and then decide if you want to add sugar or not. Adjust to taste and then process.
Do you need to add lemon juice when canning applesauce?
Again I’ve got encouraging information. Lemon juice is also optional.
Ball includes 3 Tbsp of bottled lemon juice. The NCHFP does not mention it at all. I don’t put lemon juice in my applesauce.
- I’ve read that lemon juice can help keep your applesauce color nice and bright.
- I’ve also read that lemon juice does add flavor to apple juice.
If you’ve got super sweet apples and no tart apples, the lemon juice may just add that bit of tartness that will make the flavor shine!
Steam Canning Applesauce
The canning directions I’ve included are for water bath canning as I know some people don’t have a steam canner. But Applesauce is the perfect project to use in a steam canner. You can use the same processing time as a water bath canner but follow the steam canning process.
Steam Canning is quickly becoming my go to process for any high acid food.
Pressure Canner Applesauce
I don’t recommend using a pressure canner to process applesauce. It is not needed. And applesauce is a product that is known to swell and causes siphoning issues. However… I know some people might prefer it so… I’ll include processing instruction here.
Make your applesauce and fill jars as instructed. Processing time is listed below, for information on how to use your pressure canner check this page.
- Pints are processed for 8 minutes
- Quarts are processed for 10 minutes.
Pay attention to the proper time for the proper equipment.
- use the chart for the style of pressure canner you are using.
- check the altitude adjustments for your altitude.
Dial Gauge – Watch the dial on your canner to determine pressure.
- Altitude – Weight (pounds pressure)
- 0-2000 – 6 lbs
- 2001-4,000 – 7 lbs
- 4,001-6,000 – 8 lbs
- 6,001-8,000 – 9 lbs
Weighted Gauge – Watch for the weight to ‘jiggle’ to determine pressure.
- Altitude – Weight (pounds pressure)
- 0-1000 ft – 5 lbs
- Above 1000 – 10 pounds
Source – National Center for Home Food Preservation accessed August 28, 2023
Instant pot applesauce for canning.
So I want to emphasize that pressure canning in an instant pot is not something I promote. This article has information on how you CAN sometimes use your instant pot for water bath canning. This will depend on jar size and the size of your instant pot.
Making applesauce in an instant pot.
But if your question is about making the applesauce in the Instant Pot to use for canning, then yes, absolutely, you can use the Instant Pot to make applesauce for canning. Here’s how.
Prepare
- Wash, peel, core, and chop your apples.
- Place the chopped apples in the Instant Pot with a small amount of water.
- You can add a bit of lemon juice if desired. To taste.
- You can sweeten the applesauce with sugar to taste, if desired.
Cook
- Close the Instant Pot lid and set it to “Manual” or “Pressure Cook” mode. Cook the apples on high pressure for about 5-7 minutes.
- Once the cooking time is complete, release the pressure manually or allow it to release naturally, depending on your preference and the Instant Pot’s instructions.
- Use a potato masher to mash up your apples to the consistency you like. If you want very smooth you can use an immersion blender. But be cautious. The sauce will be hot, don’t spatter and burn yourself. And don’t over blend, you’ll end up with the sauce being liquified.
Process as usual.
You’ll then proceed to fill your jars and water bath or steam process as usual.
Frequently Asked Questions
Once canned, applesauce lasts for at least 12 months, like all canned goods that are stored under the proper conditions (dark and dry, with no major temperature variations). This is a quality issue not necessarily a safety issue. So if it’s been a year, just make a plan to use it up. It is still good.
Once opened, however, I suggest eating the applesauce within a week or two.
Note that if you use less sugar in your applesauce, it will not last as long after opening the jars. As always, discard if you see mold or other signs of spoilage.
Yes, if you are not careful, you can scorch the bottom. And as you cook the applesauce, it will get thicker and thicker to a point where it is not sauce anymore. Add some cinnamon and sugar–you’ll get apple butter!
“My applesauce was too thin. What did I do wrong? And how can I fix runny applesauce?“
You may have added too much water when you cooked your apples for canning applesauce. You only need a small amount. 1 cup is if you have a nice full pot, so you might try 1/2 cup next time. Or if you don’t have many apples, you can go even less. The goal is that you have enough moisture so you don’t burn the bottom. You can also leave off the lid so it doesn’t collect moisture from the steam.
Add sugar to taste. This will depend on the sweetness of the apple you chose. I try for as little sugar as possible, sometimes none. (Yes, canning applesauce with no sugar is okay too.) Go ahead and taste it, and then add sugar if you think it needs more.
Cinnamon is another great addition. If using cinnamon, stir it in with the sugar. Go light. You can always add more later. (It will be stronger after it is processed.)
Since apples are a high-acid food, they’re safe for water bath canning and don’t require pressure canning. Learn more about why here.
- ~21 pounds Apples
- Sugar optional
- Cinnamon optional
- Lemon juice optional
- Start by preparing jars and getting water in the canner heating. You want the canner hot, but not boiling, when the jars are ready to be processed.See full water bath canning instructions here.
Peel, core, and slice apples.
Place the apples slices directly into a large pot with 1/2 to 1 cup water.
Bring to a boil, reduce heat, and simmer (covered) until apples are tender.
Run your apples through a food mill or mash with a potato masher.
Sweeten to taste. Reheat to a boil.
Pack hot applesauce into hot jars, leaving 1/2″ headspace.
- Remove air bubbles. Wipe the rim clean and place on your seal and ring. Place the jar in the canner. Proceed to fill all jars. Process according to the chart below.
Process according to the time and altitude adjustments listed below.
Pin This to Find Later
Source: The National Center for Home Food Preservation and Ball
Source link


