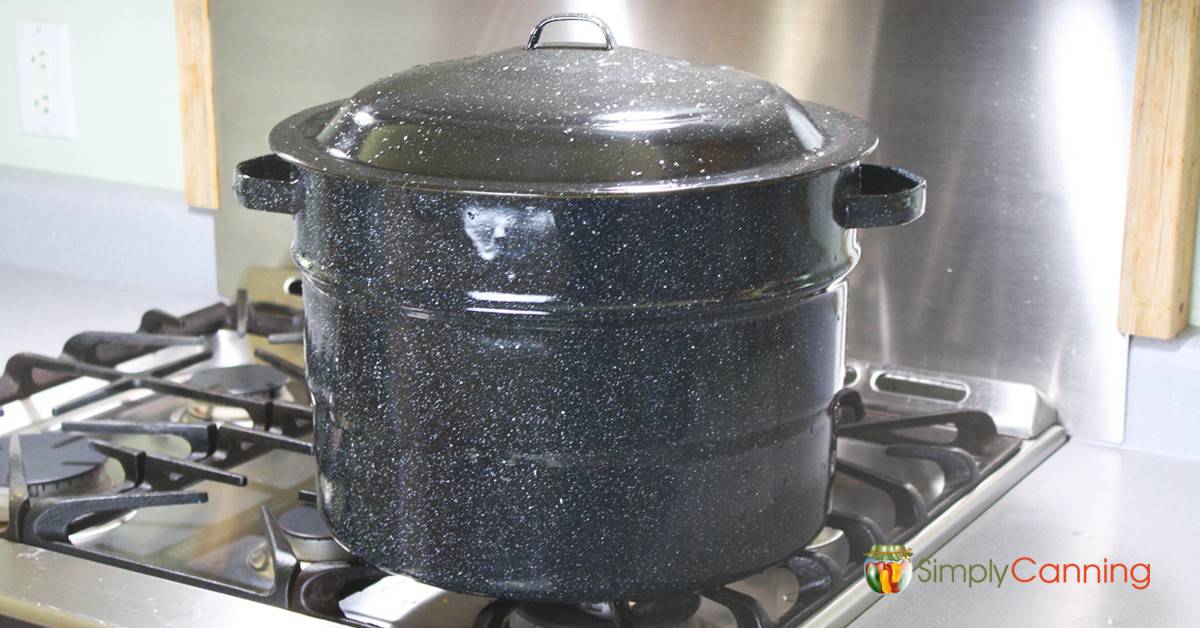
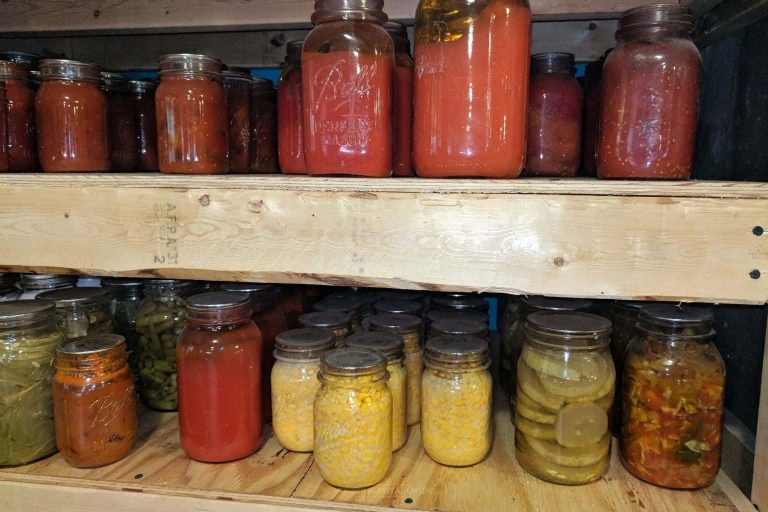
A canning pot for water bath canning is a specialized pot used for home food preservation. It can only be used when processing high-acid foods through the water bath method. High acid foods include fruit, jams jellies, pickles and salsas.
Hot water bath canning is a method of food preservation where you fill canning jars with your chosen food, submerge them in hot water and bring to a rolling boil for specific processing times. The jars will seal during the process. This ensures that your food is safe for storage on the shelf and ready to be enjoyed whenever you desire.
Size of Water Bath Canner
A water bath canner will be deep enough to completely submerge filled canning jars. Water is boiled and circulates around the jars effectively heating them to a temperature that will preserve those foods.
Most will hold 7 quart jars or 9 pint jars. But some are a little smaller, and there are some extra large versions that will hold 9 quart jars. (see my story at the bottom of the page).
You may encounter different names for a canning pot, such as: water bath canner, boiling water, or hot water canner – they all serve the same purpose.
There are a few styles to choose from. But if you don’t have a specialized pot, don’t worry! You can still use any deep stockpot you have in your kitchen. I’ll provide some tips on substitutions on this page.
First let’s talk about two popular options: the old-fashioned granite ware canner and the stainless steel water bath canner.
Granite Ware Water Bath Canner:
The speckled granite ware canner (like the one above) is a traditional choice. It’s an affordable option to get started.
Granite ware canners are well known and typically appear in many nostalgic canning images. They are usually black or dark blue with a speckled, mottled appearance on it’s enamel coating. They are a great inexpensive canner to start with.
Keep in mind that it may not last as long as other canners, as it can be prone to chipping and rusting. If you’re looking for something more durable, consider the stainless steel canner I’ll tell you about next. But the granite ware can be an inexpensive way to get started.
Stainless Steel Water Bath Canner
The stainless steel version is my first choice. Made of durable stainless steel, it resists rust and corrosion and lasts much longer than the granite ware. Yes, it will likely have a somewhat higher price tag, but in my opinion it’s not that much more and worth the investment.
Another pro to the stainless steel canner is that it is a multi use pot. You can use it for canning, large batch cooking, use it for blanching or other purposes.
Steam Canner
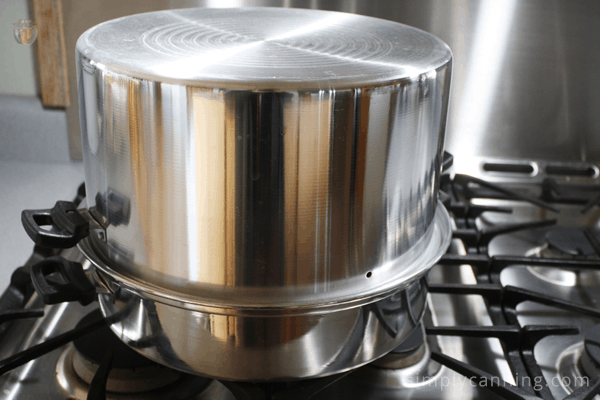
Steam canning is an alternative to water bath . You can use a steam canner as an alternative to a water bath for most high acid recipes.
If you prefer a quicker and energy-efficient alternative, the steam canner is a great option.
Traditionally a steam canner is made of lightweight aluminum. It features a shallow base with a built-in reservoir for water, a rack to hold the jars, and a tall domed fitted lid. As the water in the base is heated, it produces steam that circulates around the jars which heats them to the appropriate temperatures for canning.
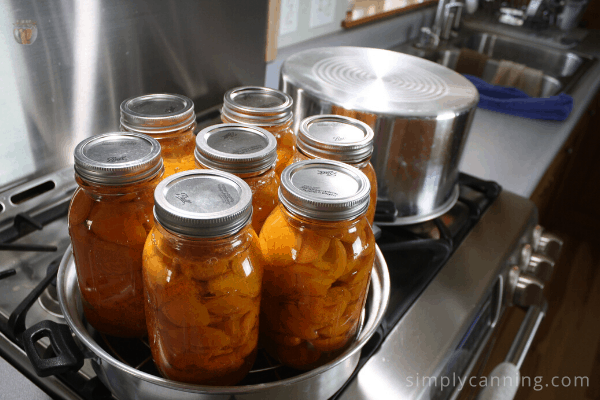
There are some stainless steel water bath canners that can double as a steam canner as well. Check here for how to steam can and find information on the two types of steam canners.
Electric Water Bath Canner
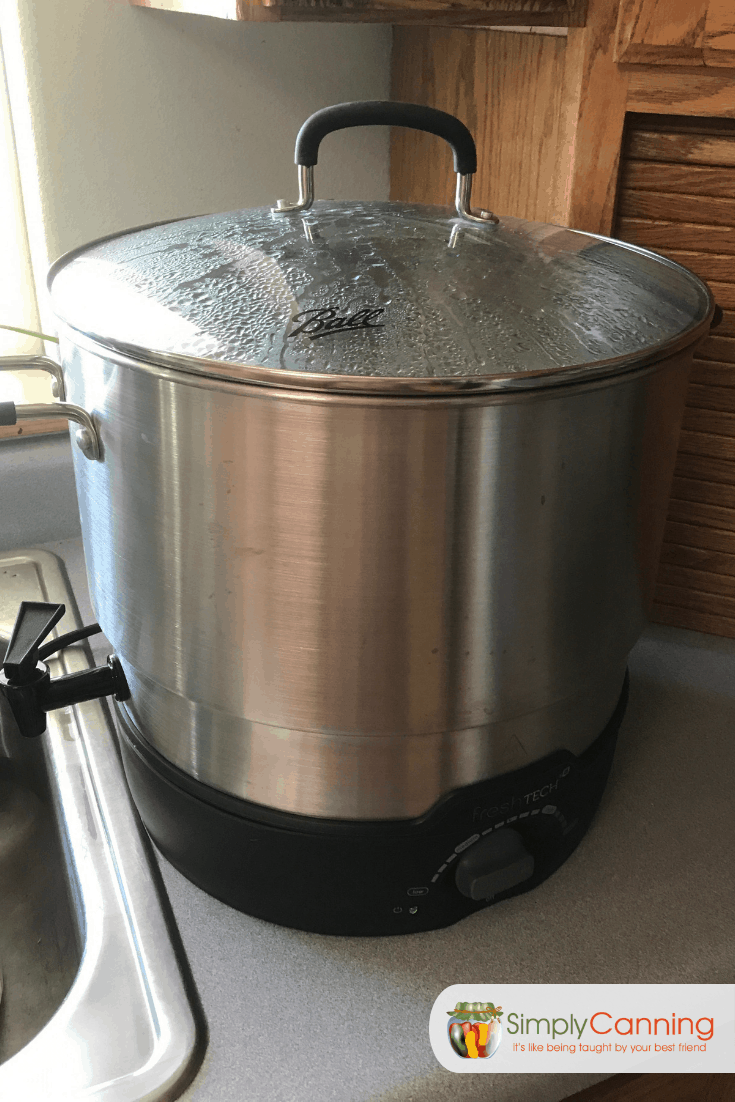
The electric water bath canner is a large pot with a built-in electric heating element at the base. It also includes temperature controls, timers, and safety features. This is great news for people who have glass top stoves which are not suitable for canning. Or those who don’t have a stove at the moment. (Like Me!) We are able to use the electric canner to do our processing of high acid foods.
Use them just like a water bath, but you’ll plug it in to bring it to a boil. Full directions should be included with the manual.
I have the Ball Elite Electric Water Bath Canner and it has done a great job for my outdoor canning while my kitchen is being built.
Rack for Water Bath Canner:
I’ve mentioned a couple times the rack. It should come with any new canner purchase. It will usually have handles that double as hangers to hang the jars on the side of the pot.
It hangs on the sides of the canner while you load your jars. When all the jars are ready you lower the rack with all the jars at once into the hot water. Heat to boiling and continue with your canning recipe.
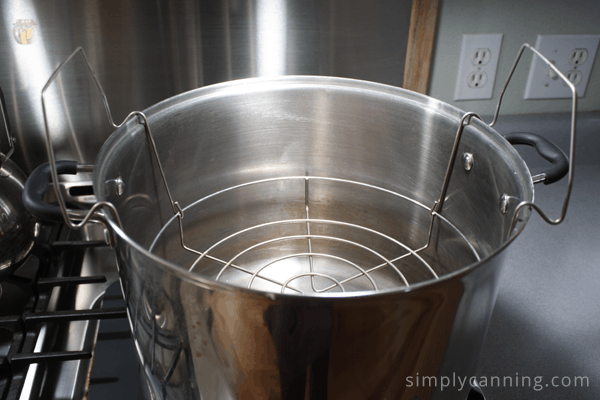
True you could put some sort of flat rack on the bottom of the canner and use a jar lifter to put your jars in and out. But you’d need something on the bottom to keep your jars off the bottom anyway, and that canner rack is much much easier. I really recommend it.
Canner racks can be purchased. I recommend looking for a flat bottom with no dividers. Some have dividers that stick up between jars which may seem like a good idea, but those dividers fit quart size jars. They limit the number of smaller jars as you have to work around the dividers and it wastes space.
I also highly recommend getting stainless steel. The others will rust eventually and you’ll have to buy again. This is the rack I’d suggest. (opens in amazon)
What Else Can be Used as a Water Bath Canner?
No canner? No problem! You don’t need a specialized pot. If you have a deep pot in your kitchen and some sort of rack for the bottom, you’re good to go!
You can use a cake rack, a rack from a roasting pan or some other design.
Here is a small 8 inch diameter that might fit a stock pot. Do the measurements!
Do a search on Amazon and you’ll find many options. Look at the measurements to see what would fit. Or maybe the items will trigger you to remember something you already have in your kitchen.
I’ve got several ideas for canning rack replacements on this post.
Can a Pressure Canner Be Used for Water Bath?
Yes, it can! While it’s primarily used for pressure canning low-acid foods, you can also use it for water bath high-acid recipes. I did a YouTube Canning Chat regarding this very topic.
What you want to do is simply fill the canner as if it were a water bath. If you put the lid on, be sure you leave it slightly cocked and do not put on the weights. You do not want pressure.
Even without the weight these lids fit tight. Even without the weight it can gain a small amount of pressure. Leaving the lid slightly ajar solves that.
Amish Water Bath Canner
When I had my kids at home still I used to dream of getting one of these large square water bath canners. I’ve heard them called “Amish” and I believe many are probably made by the Amish. I’m not sure all of them are. Check your source if that is important to you.
The rectangle shape fits over 2 burners on your stove top and hold a lot of jars. I know one style states it will hold 15 quart jars or 18 pint jars. That is a lot of jars. Canning more at once is definitely a time saver.
How to Use a Water Bath Canner
Here are the basic steps. I’ve got more specifics and a printable checklist in this page on hot water canning.
- Fill your canner halfway with water and start heating it up. It should be hot but not boiling when you fill your jars.
- Wash and rinse your jars and lids, no need to sterilize. Keep the jars hot by placing them on the rack above the water while it heats up.
- Follow the specific canning directions for your food. Remember to pack the jars with proper headspace, remove air bubbles, wipe jar rims, and seal with lids and rings.
- Lower the jars into the water, adding hot water if necessary to ensure they’re covered by about 2 inches. Put the lid on, raise the heat, and bring it to a boil.
- Once the water reaches a rolling boil, start the processing time specified in your recipe, adjusting for your altitude. Keep the water boiling during the entire processing time.
- After completing the processing time, turn off the heat. Wait for 5 minutes.
- Lift the rack and jars above the water, allowing them to rest for another 5 minutes. Then, remove the jars.
- Place the hot jars on a towel-covered counter, allowing them to cool undisturbed to room temperature, preferably for 12 hours. Do not rush the cooling process.
- Once cooled, check the seals. The center of the flat metal lid should be sucked down and not move when pressed. Remove the metal screw bands, check the seals, label, and store the jars in a cool, dark place.
Frequently Asked Questions
High acid foods are safe for canning in a water bath. This would include most fruits, jam and jelly, fruit butter, fruit sauce like apple sauce. Tomatoes can be processed in either a water bath or pressure canner (don’t forget to add lemon juice for acidification).
It can also include some pickled vegetables. Plain vegetables need a pressure canner but with the addition of vinegars to tested vegetable pickle recipes, they can also be put in a water bath.
Each food type will have a separate processing time. There is no general universal time. Follow tested recipes for the project you are working with.
Stainless steel water bath canners like this one are beautiful, long-lasting and best of all double as steam canners and large stock pots. One pot, three uses!
With a steam canner, you use less water and less time. It has been proven to be safe when the directions are properly followed.
Botulism Risk – Learn how to protect yourself by using safe canning methods.
My Story with a Large Water Bath Canner & Auctions! Love It.
Since I put up a lot of jars each year, I wanted to purchase a large capacity pot in order to jar nine quarts at a time. I put off purchasing one because I was concerned about how it would fit on my standard sized stove.
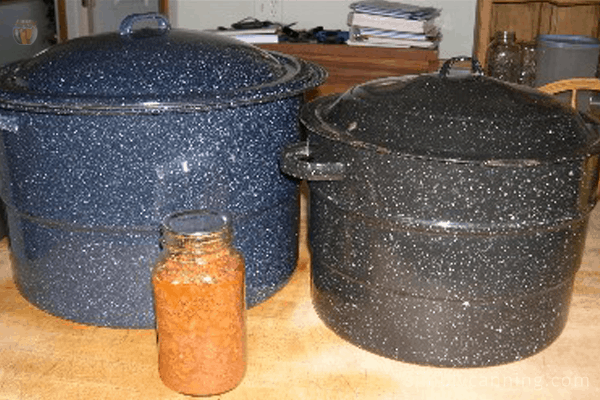
One day I was at an auction and there was a beautiful blue, large 9-quart water bath canner–complete with jars! I bid on it and won!! I got it at a great price. I love auctions!
This larger size pot fits over two burners on my stove, and it works perfectly fine. It does take longer to heat. This is to be expected because it holds so much more water. If I am canning a lot of something, it is nice to be able process nine quarts at a time.
Pin This to Find Later!
Page last updated: 10/7/2021


