This site contains affiliate links. As an Amazon Associate, I earn a commission from qualifying purchases at no extra cost to you. Full Disclosure Here.
A disaster strikes and you are left with no home, or you get lost in the wilderness and you’ve got nowhere to sleep. You need shelter before the elements turn on you. What do you do?
What you need is a survival shelter. One of the easiest survival shelters you could make is a lean-to. But do you know how to build a lean-to shelter? This post is all about helping you build a lean-to for shelter from the elements and to keep you warm and safe.
By the end of this post, you would have learned the most important preparedness skill.
What Is a Lean-To Shelter?
This is a versatile outdoor survival shelter that can be used in different locations and seasons.
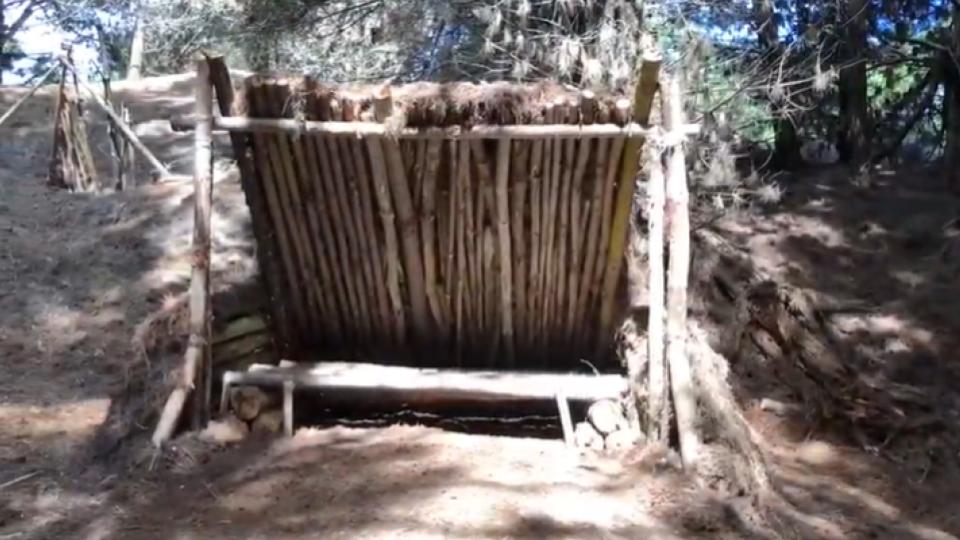
This unique survival shelter gets its name from its design. A collection of materials leaning against a uniquely made structure. You can make a lean-to shelter in different configurations and sizes, such as open or closed, depending on the season and weather.
Parts of a Basic Lean-To Shelter
A basic lean-to is made up of several parts, including:
Uprights
These are the most important part of the construction because they provide the much-needed support for the shelter. The ideal uprights can be two naturally growing trees in the woods or two poles made using lashing techniques.
The distance or length between the two trees or poles is an extremely important measurement. It should be a little bit longer than your height.
Ridgepole
The ridgepole is the main beam that is attached to the uprights of a lean-to. It supports all other structures of the shelter. It needs to be fairly thick and strong to provide the support needed by other structures without collapsing.
Spars
Spars refer to the poles that rest on the ridgepole and the ground. Apart from deciding the depth of the lean-to, the spars also define the framework of the shelter.
Some lean-tos are made of closely packed spars to reduce the number of materials needed for roofing. Although the spars need to be strong, they don’t need to be too thick to avoid collapsing the ridgepole.
The number of spars you need for your shelter depends on how far apart the uprights are positioned.
Ribs
Ribs refer to the flexible branches, twigs, or sticks that are woven on the spars horizontally. The number of ribs you need for added strength and structure depends on the material you will be using for roofing. You may need lots of ribs that are closely packed if you are planning to use leaves for roofing.
Roof
This refers to the structure that extends from the ground to the ridgepole. It includes spars, ribs, and insulating materials. Some of the most recommended materials for insulating the roof include palm leaves, tree boughs, pine needles, moss, ferns, and grass among other things that can be sourced naturally from the surroundings. You could also use a tarp if you’ve got one in your backpack.
Wall
You can place a wall made of poles, twigs, and palm leaves or grass on one side of the lean-to as a windbreaker. A wall can also be used as a heat saver. You could also choose to place a wall on both sides of the shelter.
Foot Log
This is an optional part that you can choose not to include if you don’t want to. It is a pole positioned directly below the ridgepole.
Fire and Firewall
Every lean-to no matter how basic it is needs a fire pit for keeping warm. The fire is usually positioned at a safe distance from the front of the shelter. A firewall, on the other hand, is a wall that is built on the outer side of the fire. Its main job is to break the wind and reflect heat and light towards the shelter.
How to Build a Lean-To Shelter
These are the most important steps you need to follow to build a lean-to shelter.
Step 1: Find a Suitable Location

Although you are in dire need of an emergency lean-to, you must find a suitable location. After all, a well-built emergency or survival shelter in a risky location is a bad shelter. Finding that suitable location doesn’t have to be a difficult proposition. You just have to consider the following:
Resources
We can’t stress enough about resources. A location without leaf litter, twigs, branches, and trees will not be of much help when it comes to constructing a lean-to. A mixed-wood woodland would be the most ideal place.
In addition to building resources, you should also consider an area with access to a natural source of water like a stream, if you can find one. A suitable location, however, may be a challenge to find in areas that are covered by snow. So, you might have to be more creative.
Terrain and Grade
You wouldn’t want to be waterlogged when it rains. You also wouldn’t want to set your shelter on a rocky terrain that would be difficult to sleep on. Also, make sure the grade of the terrain isn’t inclined.
Drainage
Drainage is an extremely important consideration if you are in a region that receives rainfall most of the time or if it is a rainy season. The ideal spot that will provide good drainage is always higher ground.
Safety
We recommend you thoroughly explore the area to uncover any possible scenarios that could put you in harm’s way. Are there dead trees or branches on the higher ground that may fall and hurt you? Is the soil easily eroded by running water?
Step 2: Setting Up the Uprights

The uprights are basically the foundation of a lean-to shelter. They need to be as strong as possible to be able to support the other structures of the shelter.
The most ideal uprights would be the trees that are growing naturally in the woods. Trees with a high canopy are the most ideal ones because they have a higher part of the trunk exposed. The trees need to be far apart (around 6 to 8 feet apart) and in alignment. We recommend a distance of around 6 to 8 feet, assuming that you are a 6-foot tall individual.
But the measurement can vary depending on your height and preferred sleeping position. If you are the kind of person who likes to stretch out when sleeping, then you will need the distance between the uprights to be as long as possible. But a shorter length would do if you like sleeping in a fetal position.
If your preferred location or site doesn’t have trees that are suitably aligned near to each other, then you can use logs to create your own uprights. You just need two logs of the same height and two holes on the ground that are properly aligned.
Step 3: Setting Up the Ridgepole

The ridgepole is one of the most important parts of the shelter because it supports the other parts of the structure. The log you choose to use should be longer than the distance between the two uprights.
If the uprights are 6 feet apart, for example, then the ridgepole should be around 8 feet (considering the thickness of the uprights). Then you have to decide how far up you should set up the ridgepole. We recommend a height of about 4 to 6 feet, depending on how far apart the uprights are from each other. If you’ve got ropes with you, then you can tie the ridgepole to the uprights.
But you will have to be more creative if you don’t have ropes. You can use y-shaped branches (spars) of equal length. Apart from holding the ridgepole into place, the two y-branches on the outer ends will be the first two spars of the shelter.
Step 4: Setting Up the Spars

You will need several poles for spars. They should be slightly longer than the two y branches you used to support the ridgepole. Setting up the spars is probably the easiest part of the construction.
The number of spars you will use depends on the type of material you can source naturally for roofing. You can space them out at an equal interval or pack them closely together. The spars will shape out your lean-to shelter. So, try as much as possible to use poles of equal length.
Step 5: Ribbing

This step will help strengthen the shelter. You will need sticks that are either thumb-thick or wrist-thick, depending on how far apart you spaced the spars.
You can do the ribbing under or over the spars. But over the spars is more suitable. Make sure the ribbing isn’t too high or else you may invite the possibility of water running down the ribbing and into your shelter.
Step 6: Roofing

If you’ve got a tarp in your backpack, then you can simply set it up over the ribbing. But if you rely on nature for all your building resources, then you will need lots of leaves or moss.
Leaves are usually in abundance on the forest floor. Use your fingers or a pole like a rake to move leaves close to the shelter. This shouldn’t take you more than half an hour to do. Before using the leaves, make sure that you check them for ants.
Cover the entire shelter with piles of leaves. The most effective packing technique is to slide the leaves down along the ribs. All you need to do is reach up to the top of the pile and bring your hands downward in the same direction as the ribbing.
Chances are that the leaves are dry. So, they could easily be blown away on a windy day. We recommend you lay dead branches or loose bark over the lean-to to keep the leaves from blowing away.
Step 7: Setting Up the Wind Breaker

The shelter is technically ready by now. But you can make it more reliable by adding a windbreaker (a wall). You can use anything resourceful to set up the windbreaker wall.
But we recommend you attach poles to one of the y-shaped branches. Insert the poles into the ground and attach them to the y branch. Pack them closely to create a wall. You can create a similar wall on the other end of the structure.
Step 8: Setting up the Fire

Any survival shelter in the woods needs fire for keeping warm, lighting up the place, and keeping animals away. It is best to set up the fire about 1 to 2 feet from the entrance of the lean-to shelter. It is also advisable to create a wall behind the fire.
The wall will act as a windbreaker as well as a reflector of heat and light. You just need about five to 10 poles to create a wall behind the fire.
You need to build a traditional fire pit by placing stones in a circular shape. Place logs in a cone shape inside the fire pit to create a fire that will last longer. Make sure you’ve got enough wood to fuel the fire. It will also be great if you have a reliable fire starter with you.
Step 9: Finishing Touches
Get a thick pole that is the same length as the ridgepole and set it up at the bottom of the uprights directly underneath the ridgepole. You can also choose to build a raised bed by placing poles or logs of similar length and width inside the survival shelter.
Final Thoughts
In any survival situation, your means are very primitive. It is up to you to have the wit and ability to create a reliable survival lean-to shelter for yourself. We created this guide to help you learn how to build a lean-to shelter. This way, you can always be prepared for the worst-case scenarios.


