Estimated reading time: 21 minutes
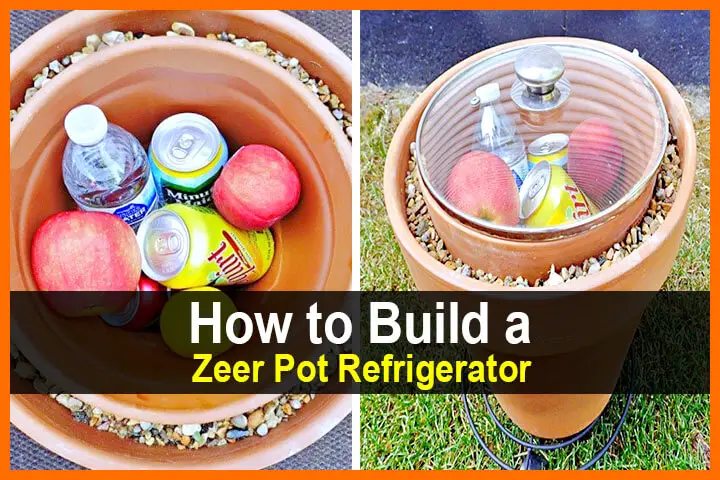
A Zeer Pot is an ancient invention that uses two terracotta pots, sand and water to create an enclosed, refrigerated environment as a result of evaporative cooling. The word, “zeer” is Arabic for large pots. It first showed up 4,500 years ago in ancient Egypt and is used in many parts of North Africa to this day.
The fundamental principle is driven by evaporation. A layer of sand between the two pots is kept wet with water and as the water evaporates it has a cooling effect on the pots. A wet cloth or even a lid is placed over the top to aid in the cooling and to keep the contents from being exposed to the warm air.
Want to save this post for later? Click Here to Pin It On Pinterest!

That’s the concept of evaporative cooling. Evaporation is the same principle that keeps our kitchen refrigerators cool. A Zeer Pot does the same thing but on a more basic level.
How Cool Is It?
Under the right conditions, the interior of a Zeer Pot can achieve temperatures as low as 40 degrees F. and even lower. That’s the average refrigerator temperature. However, the temperature can fluctuate based on the amount of water permeating the sand and other conditions.
What Are the Perfect Conditions for a Zeer Pot?

There are 5 critical success factors for effective refrigeration with a Zeer Pot.
1. Wind
The wind is the engine that drives the success of a Zeer Pot. A constant breeze against the terracotta outer pot is what causes the evaporative cooling effect. Without a breeze, the pot does not function as well. You could cheat and use a small, solar powered fan to create your breeze but windy days are made for Zeer Pots.
2. Low Relative Humidity
Evaporation occurs most effectively in environments with low humidity. High humidity hampers evaporation and hinders the evaporative cooling effect. If you live in an area with consistently high humidity you may need to find an alternative cooling and refrigeration alternative.
3. High Temperatures
It seems counterintuitive to point to high temperatures as a success factor for refrigeration, but this gets back to evaporative cooling. Water evaporates more rapidly with high temperatures and the more evaporation – the better the cooling. However, direct sunlight is not a good idea.
4. A Shady Location for the Pot
Ideally, the Zeer Pot is kept in a shady location at all times. The sun will not only cause the evaporation to happen too quickly, but will heat up the terracotta pots canceling out the overall cooling effect. You could create some shade with a small tarp, umbrella or even improvise a quick little roof over the pot if you need to. Whatever you do, keep your Zeer Pot in the shade as much as possible.
5. Water
If wind is the engine for a Zeer Pot, water is the fuel. It’s the layer of sand and water that makes a Zeer Pot work. On average, you may need to carefully refill the sand-filled space between your two pots with water up to 3 times a day.
That will keep your pot working at its peak. They don’t require a lot of water but always fill the sand layer until you see the water peeking out from the top of the sand, or in the case of our design – the top layer of pea gravel.
On days with less evaporation as a result of lower temperatures or no wind you may need to refill less. The downside is that less evaporation means less cooling effect so be happy if you’re watering it 3 times a day.
About Terracotta

We’ve mentioned terracotta a few times and there’s a reason. Terracotta pottery is semi-permeable. That means that water can infiltrate the pot and have a certain amount of exposure to the exterior of the pot. This is where the evaporation effect takes place as the wind whisks the water molecules (and the heat they carry) away from the pot.
A glazed or plastic pot or any other kind of pot should not be used for the outer pot. The inner pot could be a non-permeable material but the outer pot must be terracotta. In case you’re wondering, terracotta pots are the standard red-clay flower pots you see at home and garden centers.
What Can Be Stored in a Zeer Pot?

The primary foods that were traditionally stored in Zeer Pots were vegetables. Under the right conditions a Zeer Pot can extend the shelf-life of many vegetables 10 to 15 times longer than if those same vegetables were stored at room-temperature.
A critical thing to remember is to put the vegetables in the pot unwrapped and un-bagged. One of the things that preserve vegetables so well is the moist environment in the cool temperatures of the pot.
In that regard it works much like a crisper in your refrigerator where you can adjust the humidity level. It’s tempting to place your vegetables in a resealable plastic bag – don’t do that. That will seal of the vegetables from any beneficial moisture in the pot.
Here are some vegetables that have historically done well in a Zeer Pot:
- Peppers
- Root vegetables like radishes, beets, parsnips, carrots, and turnips
- Tomatoes
- Okra
- Small squash
- Beans and peas
- Green, leafy vegetables
What About Fruit?

Fruit works. But there’s a caution. You really shouldn’t mix fruit and vegetables. Fruits release ethylene gas which accelerates ripening of both fruit and especially vegetables. Rapid ripening leads to spoilage and that’s not the idea. If you want to store fruit in your Zeer Pot either dedicate the pot to fruits only or make two pots: one for fruit and one for vegetables.
A challenge with some fruits like berries and grapes is that that don’t do well unpackaged in a Zeer Pot. Place them either in a mesh bag or a plastic bag with holes or slits. You always want some of the moisture to circulate around the fruit or vegetables.
Let’s Make a Zeer Pot

The fundamental concept is both simple and easy, although we’re going to add a few design features to make it work a little better and keep things neat. Here’s what to do:
Tools:

Equipment:
- One terracotta pot with a 12-inch diameter
- One terracotta pot with a 10-inch diameter
- A 10-inch pot lid from a kitchen pot or buy one. (Preferably one with a clear, glass lid so you can see inside)
- About a bucket of sand (more or less)
- A couple of handfuls of Pea Gravel
- A funnel
- A small plant stand for the pot
- A refrigerator thermometer (optional)
- Water

Directions:
- Place a piece of duct tape over the hole in the bottom of the larger, 12-inch pot. Do the same with the 10-inch pot.

- Flip the pot up and fill the hole with silicone sealer. Repeat with the silicone for the smaller pot. You want the pots to be watertight. Let dry.

- Place a crisscross of duct tape over the dry silicone in both pots.

- Stand the pots up side by side and measure the difference between the pot heights. You want them to be level at the top when the smaller one is inserted into the larger one. Measuring the difference between the two pots will tell you how much sand to place in the bottom of the larger pot before placing the second pot inside.

- We came up with a 2-inch difference, so we’re going to fill the bottom of the larger pot with 2-inches of sand.

- Level the sand so the second pot sits neatly inside the larger pot with a clean, even clearance around the rims of the pots.

- Carefully fill the gap between the two pots with the remaining sand.

- Alternate sides as you fill with sand, but leave a 1-inch clearance at the top for your pea gravel.

- Placing the lid on top of the smaller, inner pot while filling the gap with sand will help prevent sand from spilling into the inner pot where you’ll be storing your fruits or vegetables.

- Fill the gap with the pea gravel to the tops of the pots. The pea gravel will make it easier to add water without sand splashing and spilling into your vegetable/fruit chamber.

- The sand and pea gravel topping should come just below the rim of the small, inner pot.

- Gently insert the funnel into the pea gravel and carefully start pouring water.

- Move to the opposite side of the pot and continue filling with water until you see the water level rise up into the pea gravel, and then stop filling.

- Place the pot on top of a short plant stand. Raising the bottom of the pot off the ground and exposing it to air circulation will enhance the overall evaporation.

- Replace the lid. Don’t add vegetables or fruits at this time. You want to wait until the chamber has cooled.

- Once the chamber has cooled a bit, you can add your food and drinks.

- Locate your pot(s) in a shady spot with exposure to wind.

- It also helps to place a wet piece of fabric (we used a washcloth) over the top of the inner chamber.

- Refill with water from time to time to keep the evaporation rate going. Over the days you’ll get used to how much and when to add water. There are so many variable affecting evaporation of any particular pot that you just have to go with trial and error. Keeping a lid on the pot over the wet fabric helps to keep things cooler as well.

When all was said and done we used about a quart of water for our first filling in our Zeer Pot.

What Else Can I Keep Cold in a Zeer Pot?

One of the first things to think about is canned soft drinks, beer, water bottles or juices you want to keep cold. You could also store eggs (especially if they are fresh from the farm and unwashed although some would argue they don’t need refrigeration), butter and even some cheese.
Be careful with dairy though. Once you have some experience with your Zeer Pot, and if you live in an environment with favorable conditions for evaporative cooling, you can start experimenting with others foods you traditionally refrigerate.

One option to think about is a refrigerator thermometer. Place it in your Zeer Pot and if you have a glass lid on your pot you can see how things are doing. If you find that you have a stable temperature range of 35 to 40 degrees you can increase the range of foods you keep cool.
Of course in an emergency you may just have to roll the dice and hope for the best.
Zeer Pot Fails
Like anything else some things can go wrong with a Zeer Pot. Here are few to think about:
Don’t Use an Enormous Pot
It’s tempting to assume that a bigger pot would be better. After all, it could hold more food. Unfortunately, the laws of thermodynamics that rule evaporative cooling don’t agree. The larger space in a larger pot will always struggle to stay safely cool with just evaporation. It would seem like that larger outer pot would compensate but there is a point of diminishing returns with Zeer Pots.
If you need a lot of space to keep things cool for the long-term think in terms of root cellars and other refrigeration alternatives. Better yet, put together more than one Zeer Pot and after a while, experiment with pots a little larger to see how far you can push it. The telegram is start small with the 10 and 12-inch pots.
Lime Buildup on the Outer Pot
A lot of this depends on the kind of water you use. Well water is loaded with minerals and while some of those minerals might be good for you, they eventually crystallize on the outer sides of your larger pot. As the semi-permeable terracotta gets more and more crystallized (especially with lime) it loses its ability to enable evaporative cooling.
One solution is to wash and scrub the outside of the pot with lemon juice or vinegar. There are also products like CLR, but if you’re using a Zeer Pot for your refrigeration there’s a possibility that things like CLR might be hard to find. You also have to wonder if you want an chemicals permeating your pot.
Another solution is to soak the pot in fresh water for a week or more and then let it dry in the sun. A little scrubbing might help and it might get rid of a lot of the lime. If all else fails, start over with a new pot or figure out how to make your own clay pots from scratch.
Polluted water can also create problems. You don’t have to perfectly purify the water you use in your Zeer Pot, but any water you use will eventually end up on your food as evaporated vapor. Rainwater is a great source but if you wouldn’t drink the water to begin with it probably shouldn’t go into your pot.
Uncooperative Weather

The success of a Zeer Pot is largely dependent on the weather. Even with a perfectly designed pot and a diligent addition of water, if the weather’s not right the pot won’t work.
Lack of wind is the biggest problem for most people and that’s where that solar fan idea can save the day. Always try to keep your Zeer Pot exposed to the wind, even if it’s just a gentle breeze.
Another serious weather factor is high humidity. If you enter a period of low pressure with high humidity, rain, fog or just oppressive humidity hanging in the air the Zeer Pot will stop functioning.
Unlike the wind solution with solar fans there are few solutions with humidity. You could try taking it inside and rigging up your solar fan somehow, but chances are good it will be very humid indoors as well.
Low temperatures are another factor. Zeer Pots were designed to work in the ancient Egyptian desert. If you live in a desert you’re in luck as far as Zeer Pots go. Higher temperatures drive evaporation and Zeer Pots need evaporation to work. Just stay out of the sun.
Then again, if the temperature gets low enough you can just improvise other solutions using the colder temperatures to keep your food cool. It’s the 50 degree days that make things complicated. Not great for evaporation and not cold enough to provide effective food refrigeration at that temperature outside of the pot.
Why Would You Need a Zeer Pot?
There are a range of possibilities from convenience to disaster. Here are the possibilities in that order:
? An Off-Grid Lifestyle Choice

The standard options for off-grid refrigeration usually run along the lines of root cellars, propane refrigerators and cold boxes in a spring creek. There are other approaches but a Zeer Pot could be a definite consideration for anyone pursuing an off-grid lifestyle.
? Remote Camping or Fishing Trip

A remote adventure appeals to many of us but a common challenge is finding anywhere to buy the most basic items including things like ice. At those times, we know if we can’t take it with us we’ll have to do without. That usually includes cold drinks and refrigerated foods. But a Zeer Pot can change all that.
Go ahead and pack up the cooler and load it with ice but pack a Zeer Pot next to it. When the ice melts you’ll have the Zeer Pot to keep things cold. At least some of them depending on the size and number of your pots.
? Short-term Power Outage

It happens all the time and while most are measured in hours, more and more outages are stretching into days and even weeks. Improvising a Zeer Pot or having one already made and ready to go could save the day. Or at least the cold cuts and the cheese.
? Major Disaster

Major disasters seem to be showing up more and more as well. Mostly due to climate change. The result is not only widespread power outages, but long-duration outages with local services and stores also affected. Refrigeration may be the least of our worries following a major disaster but for some people it’s more critical than others.
Many diabetics are dependent on regular insulin injections. Insulin must be refrigerated. In this case, something as simple as a Zeer Pot could be a lifesaving solution.
? Societal Collapse

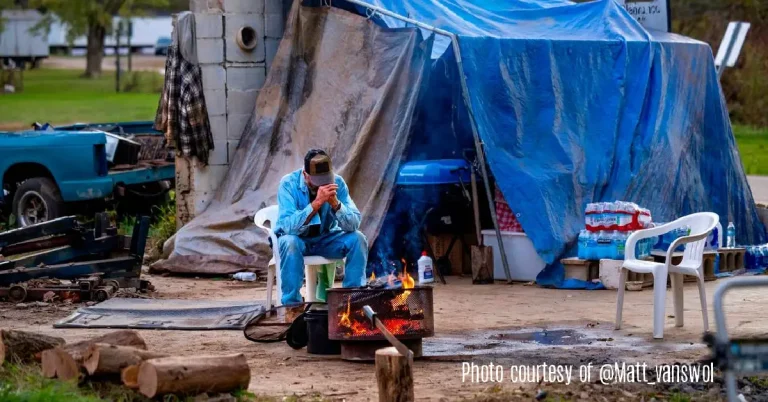
If society collapses all bets are off. In countries around the world enduring societal collapse, the most basic services are unavailable and that certainly includes electricity and all of the comforts that come with it.
Curiously, in many of those countries experiencing a societal collapse in 2023, Zeer Pots are commonly used for refrigeration. It harkens back to the origin of a Zeer Pot 4,500 years ago.
Build a Zeer Pot

This isn’t hard to do and getting a little experience with some ancient technology is always a good thing. More importantly, it could be a very valuable skill in the event of any of the situations we listed above.
Whether you’re looking for a cold beer on a fishing trip or figuring out how to keep someone’s insulin viable during a power outage, knowing how to construct and use a Zeer Pot may be one of the more valuable things you know how to do.
Like this post? Don’t Forget to Pin It On Pinterest!


