Estimated reading time: 18 minutes
If you had one year before you knew everything was going to fall apart, how would you address your food supply situation? Would you jump up and run to the store to buy a bunch of canned goods or maybe you would purchase several emergency food buckets?
Neither of those are bad options but two problems arise. You can probably only buy so much food and eventually that food will run out. At the point when you need more food, buying it may not be an option. You need a source of sustainable food and you need it now.
Article continues below.
It’s time to put on some work gloves and find your green thumb because today we are going to discuss setting up a survival garden quickly.
Want to save this post for later? Click Here to Pin It On Pinterest!
Survival Garden 101
Before you even stick a shovel into the ground there are a few things to keep in mind that will help you get off to a good start and have a successful food supply.
Investment

Unless you already have some of the tools and supplies associated with gardening, there is going to be a bit of an upfront investment. Like any project or hobby, the sky’s the limit in terms of what you can spend, but gardening in itself doesn’t have to be expensive. Just remember, what resources you put into a food garden now, will pay huge dividends down the road.
Work and Time

A garden will require your time and energy to set up and maintain. The key, however, is consistency. If you remain disciplined about tending to a garden every single day then you will avoid having to spend hours at a time on one specific task, such as weeding.
Timing

The timing of planting and harvesting is something you also need to be aware of. Dropping some seeds into the ground isn’t going to provide food in a few days. Anything of substance is going to take almost 60 days or more to grow. This is why it is so important to lay down the foundation of a garden long before your main supply of food runs out.
Available space

Before buying any tools or supplies, take a look around your property and figure out the space you have available for gardening. This includes the back, sides, and front of your home. If you have zero outdoor space, you can still have a garden but will have to opt for growing indoors. Keep a sharp eye and utilize any available space.
For more information on garden space-saving tips, click here.
Preservation

It’s important to have methods of preserving the fruits of your labor after harvesting, and this is a two-step process. The first is having methods available to preserve the food itself so that nothing goes to waste, such as using a dehydrator, freezing, or home canning.
Lastly, it’s critical to preserve some seeds after harvesting so that you can replant the next growing season. This will provide you with a truly sustainable source of food. There are various containers for saving seeds such as plain envelopes or even specialized containers. The method that is used to save seeds may be dependent on the type of seed itself.
For more information on how to preserve excess vegetables, click here.
For more information on how to save seeds, click here.
Laying The Foundation
There are many methods in which to grow a garden, such as traditional use of the available land, hydroponics, aquaponics, raised beds, and container gardening. All of these options are fine but for the purpose of this article, we are going to be focusing on raised beds and container gardening. This is because they provide the best overall benefit for beginners wanting to start a garden quickly. Let’s get into container gardening and raised beds a little bit more.
Container Gardening

Instead of growing plants in the ground, container gardening utilizes a vessel, such as a bucket, grow bags, or planting pots for growing. The main pitfalls of container gardening are that you will have to purchase or acquire containers for your plants to grow in and the growing space within the container may be minimal.
But the benefits of this method outweigh the negatives. Because the container is essentially a closed system, you have complete control over what goes into it and thereby what interacts with your food. This means you decide the nutrients the plant gets and what harmful contaminants they don’t get.
Since the containers used in this type of gardening are generally small, any weeding that has to be done is minimal or even non-existent.
Container gardening will also save you a ton with watering. Traditional farming and gardening methods waste a lot of water due to what is known as runoff. Simply put, most of the water used doesn’t get to where it’s needed and the excess water also aids in the growth of weeds. With container gardening, you can put the water directly where it needs to go without any waste.
Portability is another great aspect of container gardening, of course, this does depend on the type and size of containers you use. The value of being able to move your plants around depending on the circumstances can’t be understated.
For instance, if you are having a problem with wildlife getting into your plants or there is a bad storm coming into your area, you can simply move the containers to a safe location until the problem has been resolved. Or if you need to leave the area for an extended period, you can load the containers into a vehicle and take your food supply with you.
Container gardening can be used both outdoors or indoors. Although if you are growing indoors you may need a few additional supplies such as a grow light. Container gardening is a great option for someone that doesn’t have any outdoor space to work with, such as an apartment dweller.
For a more in-depth look at container gardening, click here
Raised Beds

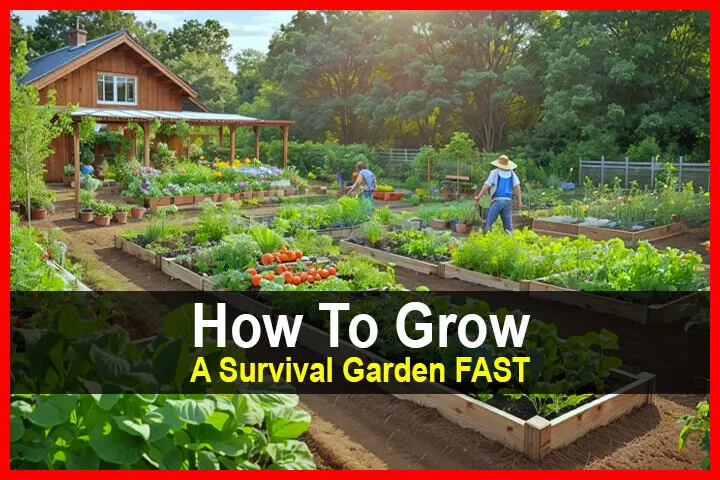
Raised beds look similar to a traditional garden because they are outside and utilize a specific area of land. The process of making one is pretty straightforward. Choose the area where you want the garden to be, create a box, or any shape you want, fill it with dirt, and plant your seeds.
The main pitfalls of using raised beds are that they do require some outdoor space and minimal upfront investment to set the framework up and fill it with soil. But just like with container gardening, there are a number of benefits with raised beds. Let’s go over them.
The soil of a traditional garden needs to be tilled or turned over before planting can occur. This doesn’t have to be done when using raised beds because they will be filled with fresh, loose soil.
The soil in your particular yard may not be suitable for gardening for whatever reasons. Maybe it’s too rocky or sandy or there are contaminants you are worried about. Since raised beds are placed on top of that soil, none of those issues matter. By the way, this also applies to container gardening as well.
Raised beds also bring the work area up to a more comfortable working height for when you have to get down on the ground and get dirty.
The size of the bed can be as big as you want but generally speaking, it’s best not to make it wider than what you need for a few rows of plants. This way you can easily reach anywhere within the garden without having to actually get into the bed itself.
Just like with container gardening, you can save a lot of water if you install what are called drip lines. Drip lines are hoses with tiny holes in them that allow water to be released slowly and near the plant itself. This gives the plant the water it needs without having to worry about runoff or watering potential weeds.
For a more in-depth tutorial on raised beds, click here.
Best Foods To Grow
Growing a garden can be fun and many view it as a hobby, but when it comes to a survival garden, you need to make smart choices with what you grow. This is because you want the most calories you can get in the area you are growing. Below are a few popular, high-caloric choices.
Potatoes

When you are looking to grow the most calories in the smallest space possible, potatoes are leading the pack as every 5.3 ounces contains roughly 110 calories, according to Potatogoodness.com.
Potatoes are also a popular food among most people because they can be cooked in a variety of ways. They’re also extremely easy to grow as they don’t require a lot of attention. Lastly, they grow well in both raised beds and containers and after harvesting, they keep well when they are stored in cool locations.
Corn

Due to its size corn is better suited to be grown in raised beds over smaller containers but either way, it’s a good crop to learn how to grow. Each average-sized ear of corn will provide around 77 calories, according to the USDA. Corn is a great food to have around as it can be eaten off the ear, stirred into other dishes, or dried and used to make cornmeal or flour.
Beans

Beans come in an array of different varieties and most of them grow well in either raised beds or containers. No matter the variety, most beans provide a good amount of calories given their size. For example, for every tablespoon of pinto beans you harvest, you will get roughly 40 calories in return. That equates to over 600 calories per cup! Beans can be enjoyed fresh from the stalk or put into many different types of dishes, or they can be dried, which drastically increases their shelf life.
Lentils
Lentils are similar to beans and they are another popular garden choice. Like beans, they can be used in a variety of dishes or dried out, increasing their shelf life. Lentils will take around 100 days to grow but you can expect around 230 calories per cup of lentils harvested.
Peanuts

Like potatoes, peanuts are another plant that is relatively easy to grow and they do well in warm climates. They can be grown in both raised beds or containers but be sure they have enough depth in which to grow. Peanuts pack a punch in the calorie department because they will provide over 800 calories for every cup that you harvest. Peanuts can be eaten as is or you can put together a plan to press them for their oils.
Squash

Squash isn’t a powerhouse of calories as it only provides roughly less than 100 calories per medium squash. But they are easy to grow and if they are planted in a raised bed, consider using what is known as the three sisters planting method. The three sisters consist of growing corn, squash, and beans together in close proximity because they complement one another in several ways.
Carrots

If you like carrots, they are an excellent addition to your survival garden because they don’t need a lot of horizontal area to grow but they do need some depth. Carrots will take a little over two months to grow time, are packed with a lot of nutrients, and will provide roughly 50 calories per cup of chopped carrots.
Radishes

Radishes are actually quite low in calories, about one calorie per one large radish. But, they have one of the quickest growing times among vegetables. Some varieties of radishes can be harvested in as little as three weeks from planting, which gives you the ability to grow lots of them quickly.
Natural Pest Control
Other than the weather, the most likely threat to a garden is pests. This includes both insects and other wildlife. For insect control, commercialized insecticides may not be the best option because they may not be healthy for you. Instead, many people opt for a more natural approach to detouring insects, such as using neem oil or diatomaceous earth.
Neem Oil

Neem oil is derived from the seeds of the Neem tree and it works as a natural pesticide by repelling insects and interfering with some of their processes such as feeding and reproducing, according to Oregon State University.
For a more in-depth tutorial on using neem oil, click here.
Diatomaceous Earth

According to Oregon State University, “Diatomaceous earth is made from the fossilized remains of tiny, aquatic organisms called diatoms,” and it works because “Diatomaceous earth is not poisonous; it does not have to be eaten in order to be effective.
Diatomaceous earth causes insects to dry out and die by absorbing the oils and fats from the cuticle of the insect’s exoskeleton. Its sharp edges are abrasive, speeding up the process. It remains effective as long as it is kept dry and undisturbed.”
For a more in-depth tutorial on using diatomaceous earth, click here.
Wildlife

Insects aren’t the only ones that may be visiting your garden. Other wildlife such as deer, rabbits, birds, etc. may be stopping by from time to time and disturbing your garden. To help detour ground animals it may be necessary to set up a barrier, such as a fence, to prevent them from getting inside.
The height of the fencing isn’t the only consideration. If you have pests digging below ground, be sure to bury the fencing as deep as you need to. To help protect your garden from above, say from birds, garden netting can be stretched out over the top of the plants which helps to provide an additional barrier.
Best Time To Weed And Water
Weeding and watering seems like a pretty straightforward task and one that is not at all difficult but here are a few tips to make the process easier and more effective.
Weeding

- The key to weeding a garden is to stay on top of it by checking your garden for weeds every day. The longer you put this task off, the more weeds you will have to deal with.
- Weeds are much easier to pull out of the ground early in the morning or right after it has rained because the soil is wet and loose.
- Do your best to pull out the entire weed, roots included, and not just the surface portion you see. If you are having trouble getting the whole weed out by hand, use a trowel to dig it up, a hand rake, or use a stand up weed puller.
- Laying down landscape fabric, mulch, or hay will greatly reduce the amount of weeds in your garden.
Watering

When it comes time to water your garden, there are two things to keep in mind, the time of day and the method of watering.
- The best time of day to water your plants is in the early morning before the sun gets too high and it gets too hot. This gives the soil and the plants time to soak up as much water as possible before water starts to evaporate and it gives time for the surface of the plant and surrounding soil time to properly dry out.
- Watering in the evening or at night is generally not recommended because dampness that sits for too long can lead to fungal growth.
- The method of watering used will also have an impact on how well your plants grow. Spraying water over a wide area or spraying too much water too quickly will result in a lot of the water running off and the plant won’t get as much water as you think.
- The best way to water a plant is with a slow constant flow so that the soil and the plant have time to absorb the water.
- If you are using a regular garden hose for watering, direct the water around the base of the plant for a short count and move on to the next plant so that the water on the first plant has time to soak into the soil and begin moving downward. Once all of the plants have been watered once, go back to the first plant and repeat this process several times or until you feel they have been sufficiently watered.
- When watering plants that are in containers, go slow and don’t stop until water begins to drip out of the bottom drain holes, this way you know the soil has been saturated.
- The best and easiest way to water a garden is by using what is known as a soaker hose or a drip line. These hoses have tiny holes in them that release a constant flow of water at a slow rate. The hoses are laid out along the base of each plant so that the water goes directly to where it needs to be without wasting water or watering non-growing areas.

Below, we have compiled a list of all the common tools and supplies referenced in the above article. These tools and supplies will help you to set up and maintain your garden so that you can get the best results possible.
Tools
Supplies
Preservation
Conclusion

It’s extremely important to start developing as many different sources of food as possible, so that if one goes away you don’t starve. Gardening is not nearly as difficult as some people think and thanks to methods like container gardening you don’t need a huge outdoor space or any at all in fact, to be able to have a garden of your own. So, choose some of your favorite vegetables, grab some gloves and start planting today!
Like this post? Don’t Forget to Pin It On Pinterest!


