


This site contains affiliate links. As an Amazon Associate, I earn a commission from qualifying purchases at no extra cost to you. Full Disclosure Here.
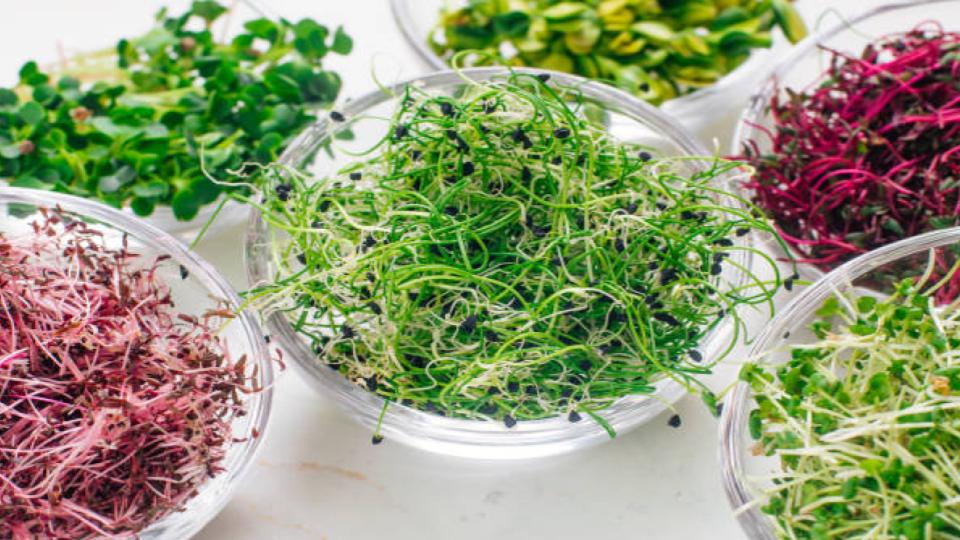
Growing microgreens without soil is one of the easiest things to produce your food. You don’t require expensive materials or a high-flying agronomic degree to do it. All you need are a few essential supplies and a DIY guide, and you are good to go!
What’s more, microgreens take a maximum of 13 days to mature. So, you should have your homegrown microgreens before the 14th day.
This practice is being largely adopted due to the increasing awareness of healthy living habits. The thing is, growing your own microgreens allows you to take more control of the cultivation process. So, you get to decide which nutritional components to focus on and which ones to avoid in your microgreens.
This situation makes soilless farming popular among folks around the world. Although, a sizable number of DIYers grow microgreens without soil for fun or for aesthetic purposes.
Before we talk about how to grow microgreens without soil, let’s first look at the usefulness of various hydroponic supplies. Basically, the success of microgreens aquaculture depends on your ability to utilize these essential materials appropriately.
Materials Needed to Grow Microgreens Without Soil
Have these materials ready before you start your microgreen farming project:
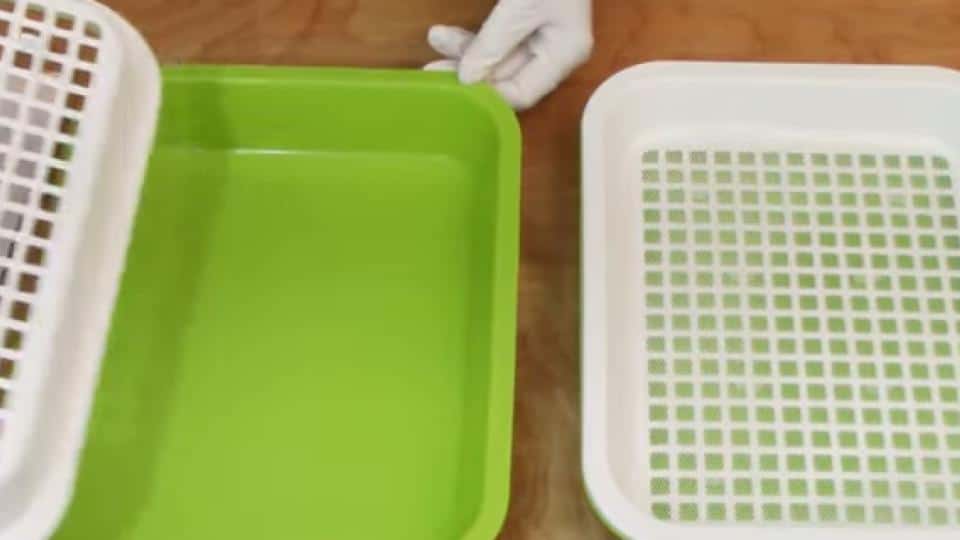
Growing trays: You’ll need standard size 10” x 20” growing trays. They should have holes to allow refill and drainage of water at stipulated intervals.
Microgreen seeds: Microgreen seeds are the primary supplies for starting this process. It will be great to pick organic microgreen seeds and stay away from seeds that were exposed and treated with chemicals at all costs. Fungicide-treated seeds carry foreign chemicals that could distort the essential nutrient control in hydroponic systems.
Light: Get a T5 fluorescent for all your lighting needs. A cheaper T8 option is equally effective if you can’t get a T5. Having a lighting system is important since you can’t expose your microgreens to direct sunlight for the first 10 days or so.
Growing medium: You’ll need a suitable growing medium, such as coconut coir or hemp mats, to hold microgreen roots in place. This material replaces soil, which is absent in such hydroponic systems.
pH test strips: pH test kits are required in hydroponics to enable constant testing of water to maintain preferred salinity continuously.
Spray bottle: An unused spray bottle is required for regular misting and application of chemicals. A new bottle is ideal to make sure that there are no traces of chemicals introduced in the microgreen beds.
Paper towels: Unbleached paper towels are preferable since the plants can absorb the dye or coloring in colored materials.
Nutrients: Specific nutrients are key to the soilless farming of microgreens. These nutrients should be organic and contain the right components for particular microgreens.
Note: Some microgreens seeds are technologically modified to carry essential nutrients for resilient growth in the hydroponic systems. Nonetheless, you should have the recommended nutrients when starting your hydroponics project. Often, microgreen seeds contain an optimal set of components that enrich the delicate microgreens.
Growing microgreens without soil is as easy as gathering these materials. So, if you have these materials ready, you are halfway to getting your homegrown microgreens.
There are several established ways of growing microgreens without soil. We’ll focus on the two popular methods for now:
- Growing microgreens hydroponically.
- Growing microgreens on paper towels.
Growing Microgreens Hydroponically

Hydroponics is a method of growing plants in an aquatic-based environment, with no soil involved. Under this method, your microgreens are set to receive nutrients from water as opposed to soil. This means that fertilizers and other desired nutritional properties are added to water to create the intended nutrient-rich solution.
You’ll require mediums like substrate to support roots in the hydroponic planting system. Other growing mediums include coconut coir, hemp mats, and rockwool. Even so, some hydroponic methods don’t require such growing mediums at all.
How to Grow Microgreens Without Soil: Step-By-Step Process of Growing Hydroponically
Step 1: Get the Water Ready

Preparing the water involves maintaining the right pH balance. The appropriate pH balance for rearing microgreens is between 5.5 and 6.5. You might have to add lime or wood ash to adjust the pH level if it is too high. You should also have phosphoric acid ready in case the pH level falls below the expected range.
It is advisable to use rainwater or distilled water if you can get it. Since they normally have the right pH balance for this kind of farming. Tap water can be used to set up your hydroponic system, but you have to boil it first or let it rest for 24 hours to let out the chlorine gas.
Once you have the right water conditions, add your chosen ingredients to start dissolving in the meantime.
Step 2: Prepare the Grow Mat
The second step is to cut the grow mat just big enough to fit the trays. Then, soak the grow mats in the water solution. After that, allow the mats to drain excess water before putting them in the planting trays.
Step 3: Plant Your Seeds

Spread the seeds over the mat. Make sure to distribute the seeds evenly for them to share the nutrients equally.
The density of seeds per square meter varies depending on the type of microgreens you are dealing with. Check the manufacturer’s recommendations for the right seed distribution.
After planting, mist the seeds with clean water. Alternatively, you can use a nutrient solution for misting.
Step 4: Cover the Seeds

Put on a light cover over the seeds.
Step 5: Early-Stage Nurturing

Your microgreens should be kept covered 24/7 in a dark place until they begin sprouting. Opening your tray is allowed once every 24 hours to enable the regular misting procedure.
Note: Most seed varieties require complete covering for around five days.
Step 6: Growing Stage

The seeds normally start growing after five days. Remove the cover and expose the tray to the grow light when this happens.
Moderate watering begins at this stage. Instead of misting, add water into the holding area. Use balanced pH water for your regular watering. On succeeding days, reduce the strength of the original water by three-quarters.
Step 7: Harvesting Stage

You can harvest your produce when they are 10 to 13 days old, depending on the type of your microgreens. This is done by cutting the microgreens off at the base of the stem.
Rinse your harvested microgreens thoroughly to wash off all chemical traces. Then, put them in moist paper towels before putting them inside the fridge.
Cultivating Microgreens on Paper Towels Without Soil
Growing microgreens on paper towels without soil is a pretty straightforward process. All you need are microgreens seeds, paper towels, water, a spray bottle, and a holding container.
Microgreens on paper towels can also be done on a large scale if you intend to sell them. For such a large-scale setup, you’ll need extended metal shelving to hold your trays in appropriate positions. Positioning is important since watering and artificial lighting are often automated using timers.
Step-By-Step Process of Growing Microgreens Using Paper Towels
Once you’ve assembled all the required materials, follow the steps below to grow your microgreens.
Step 1: Select Your Microgreens Seeds
Identify the right seeds for growing microgreens of your choice. Note that nearly all edible vegetables and herbs can be nurtured as microgreens without soil.
Notably, microgreens are dense in flavor and nutrients. That is why the practice of growing microgreens without soil is increasingly becoming popular around the world.
Microgreens vendors in your area should have these seed varieties: sunflower, spinach, amaranth, mustard, and basil.
You shouldn’t grow the following seeds on paper towels: beet, cabbage, and carrot. Nonetheless, these seed varieties can be grown in other soilless farming mediums like soil trays.
Also, tomatoes, peppers, eggplants, and other nightshade varieties should not be grown on paper towels since their sprouts are poisonous.
Step 2: Soak The Microgreens Seeds.
Soak your microgreens seeds for a few hours or even overnight for some varieties. This is done to soften the seeds to ease germination. Unsoaked microgreens seeds tend to delay sprouting.
However, certain seed varieties like basil and chia do not require soaking in advance. These varieties form a sticky gel when exposed to water. So, ensure your microgreens seeds are water-tolerant before soaking them. You may also want to read our detailed guide on sprouting chia seeds.
Step 3: Plant the Microgreens Seeds
Soak your paper towels in water, a few at a time. Then squeeze out the water to obtain the right level of dampness.
Before planting your seeds, ensure you get the right moisture level in your medium. If your paper towels get too dry, the seeds might dry out and not grow. Too wet surfaces also expose your seeds to moisture molds and other issues.
Then, fold your paper towel to get a reasonable thickness for lining the bottom of your container.
Once your surface is ready, use a small spoon to spread your seeds evenly. Do not apply too much pressure during application to avoid crushing some seeds.
After that, mist the seeds appropriately before covering them with another sheet of paper towel.
Step 4: Place Your Planting Containers in a Dark Place
Cover your medium with another container and place it in a cupboard to prevent direct sunlight.
Also, if you are in a very dry climate or growing in winter, use a plastic wrap or a clear lid to maintain the right humidity conditions inside the container.
Do not uncover the growing container more than is necessary. This is required to maintain the right humidity conditions and continuous darkness inside the container.
Step 5: Monitor Moisture Levels Daily
Check the paper towel daily to ensure the correct moisture level is maintained. If the surface is wet, do not intervene in any way. Just cover the tray back up. If it is dry, gently spray it to rehydrate the system.
When misting, use the stipulated instructions in the spraying bottle to avoid applying too much pressure. Too much pressure can dislodge the newly formed roots from the surface.
Constantly check and rehydrate the system as long as it is necessary.
Step 6: Uncover the Microgreens.
You should uncover your microgreens after seven days.
By this time, they should have grown tall and formed leaves. It is now safe to expose the plants to sunlight to begin the photosynthesis process. If you’re growing them indoors, you’ll need help from one of these quality lights for microgreens.
Photosynthesis will turn the yellowish-white coloring into vibrant green in about 24 to 48 hours.
It is safe to continue watering your microgreens to maintain the right moisture. Ensure you don’t expose the plants to too much dampness.
Step 7: Harvest Your Microgreens
Your microgreens should be ready for harvesting after 24 to 48 hours of direct sunlight. You can expose your microgreens to moderate lighting for a few more days to enlarge the stem and develop more nutrients.
In any case, you shouldn’t go beyond day 13 before harvesting your microgreens. On the 14th day, the seeds will have run out of the essential nutrients and energy to sustain stretched-out microgreens.
Final Thoughts
Growing microgreens without soil is generally a straightforward process. Most of the work is done collecting and assembling the essential materials to create an ideal planting space. After the planting stage, the rest involves simple monitoring and watering to maintain the right humidity conditions.
Even so, you can stumble into problems along the way. Common issues in hydroponic systems include wilting, molds, bad smell, uneven growth, yellow leaves, and poor germination. So, other than setting up and planting, you should arm yourself with the right ideas for troubleshooting and fixing issues as they arise.