


This site contains affiliate links. As an Amazon Associate, I earn a commission from qualifying purchases at no extra cost to you. Full Disclosure Here.
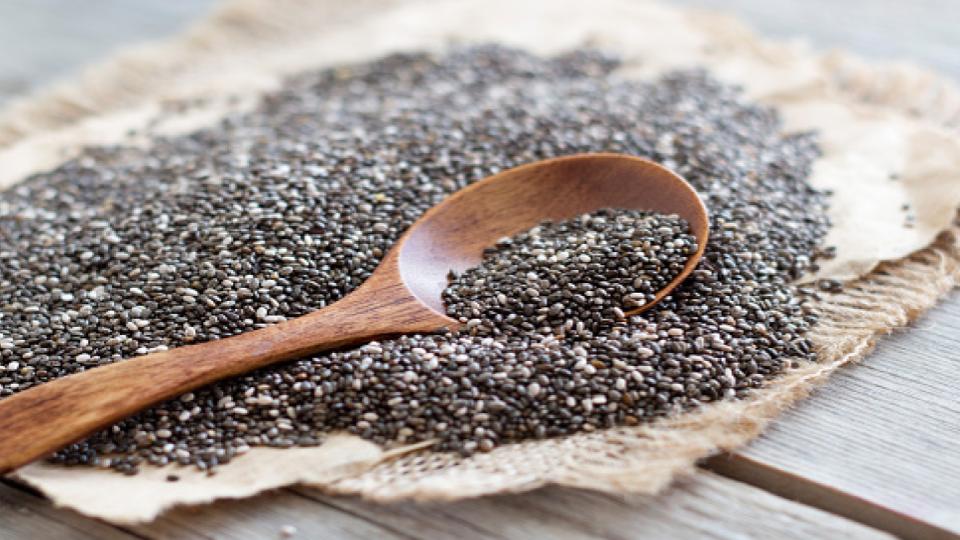
Chia seeds have been one of the ultimate survival foods for centuries. The ancient Mesoamerican Indian and the Aztec groups considered these seeds a diet staple food. Today, they are often added to nutritional smoothies and drinks, salads, and snacks.
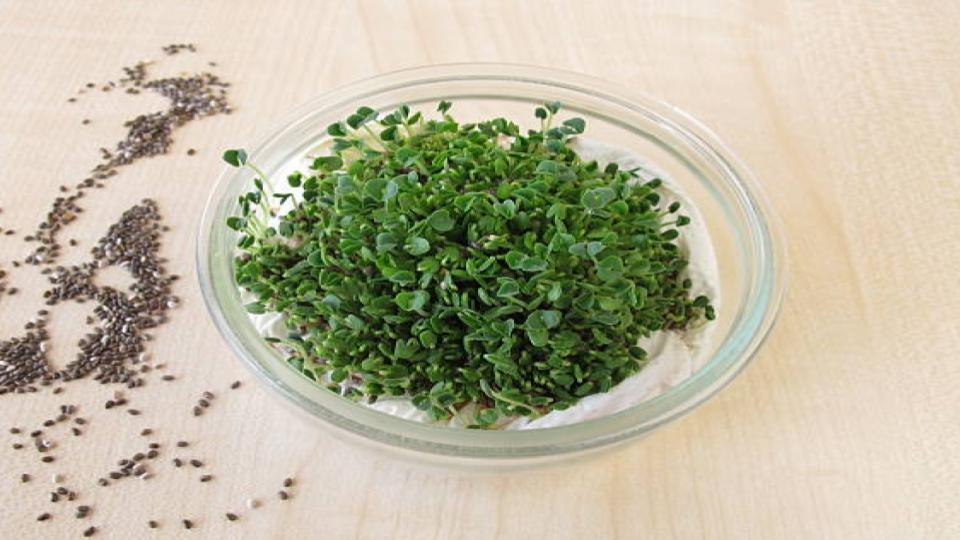
But, if you want much more nutritional benefits from these seeds, you can consume the Chia sprouts instead of the seeds. Interested in how to sprout Chia seeds? I’ll let you in on the top methods you can try, so keep reading…
The Health Benefits of Chia

Introducing chia into your diet is one of the best ways you can take in a lot more nutrients. Most people think of fish when asked about a protein-rich meal with omega-3s. But did you know that chia seeds are the best option for vegans? Chia seeds are the most affordable source of omega-3 fatty acids.
Here are just some of the health benefits of chia seeds:
- Chia seeds can prevent blood clots.
- It will raise the good cholesterol level in your body while lowering your blood pressure.
- It can reduce inflammation.
- For pregnant women, chia seeds can help develop the infant’s brain while improving their nutritional level.
- Decreases the likelihood of getting adult-onset diabetes.
Why Should I Sprout Chia Seeds?
Despite being a staple food for some cultures, chia seeds have a callous outer layer that makes it hard for the body to digest. The hard outer shell also inhibits the body’s ability to absorb nutrients and vitamins.
The best solution for this problem is sprouting the chia seeds. Sprouting the seeds can help break down their tough outer layer. This will make it possible for the body to easily absorb the nutrients and vitamins.
Sprouting chia seeds help our bodies access the fiber, protein, and omega 3s in these seeds. Chia sprouts are easier to digest, and they have more nutrients than chia seeds.
How to Sprout Chia Seeds
1. The Terra-Cotta Tray Method

Terra-cotta is a unique tray made using either brownish or brownish-orange clay and then hardened into any shape. Some of the most common shapes include figures of animals or humans, trays, plates, and pots. The terra-cotta has a porous surface that wicks water; therefore, making sure that the seeds remain moist until they sprout.
The main difference between terra-cotta and clay is that the terra-cotta is already modeled and fired. On the other hand, clay is the raw material. Terra-cotta trays can be made using a wide range of organic clay.
The terra-cotta creates an excellent airflow that protects the seeds from becoming too moist. This is important because too much moisture will result in a low-quality sprout.
Here are the steps to follow to sprout the chia seeds using terra-cotta trays:
- Spread the right amount of seeds on the surface of the terra cotta tray or dish.
- Pour some water on a different container and not on your terra cotta.
- Place the terra cotta on the surface of the massive container with water. Make sure the water doesn’t get on the dish containing the chia seeds.
- Cover the two dishes to prevent the water from evaporating.
- The terra cotta tray will absorb just enough water to keep the seeds moist until they sprout.
2. The Covered Moisture Method

The covered moisture method is one of the simplest methods for sprouting chia seeds. You just need a cover, trays or aluminum paper plates, and some water.
To sprout the chia seeds:
- Start by cleaning the shallow containers, which can be either plastic trays or aluminum paper plates.
- After cleaning it, add equal portions of water and seeds to the tray. This means that you can add two spoons of water and two spoons of seeds.
- Let the seeds sit in the tray for about an hour before tilting it to the side and draining the tray.
- Once the seeds have become moist, you can cover the tray and let the seeds sprout.
- Generally, the seeds should start sprouting after four days.
- After the sprouts have attained a height of about 0.25 inches, you can expose them to the sun and let the leaves turn green.
3. The Chia Pet Technique
Chia seeds can easily germinate when placed on any surface that allows their roots to grow and absorb water. Therefore, you can sprout the seeds on any porous material, including clay, paper, cloth, and sponge. For this method, you can do the following:
- Start by filling a tray, plate, or small dish with about a quarter cup of water.
- Soak your planter for about 60 minutes in the container of water.
- Moisten the seeds for about 60 minutes and then pour them onto the planter.
- Next, spread the seeds using a small knife or spatula of the terra-cotta planter’s grooves.
- Add some water to the planter to prevent it from drying out. The seeds will start sprouting after about five days.
- If the air in your home is too dry, you can cover the planter with a plastic bag. The plastic bag will help keep the air around the planter moist, so the seeds will sprout faster.
- You can remove the plastic bag after some of the seeds have started sprouting. But make sure to protect the chia sprouts from direct sunlight.
4. The Wide-Mouth Jar Technique
The simplest and most effective method for sprouting seeds is a wide-mouth jar. You can easily cover it with a cheesecloth cover and secure it using a rubber band with a suitable jar. The cover will ensure that the seeds remain moist while sprouting. Here are the steps for this technique:
- Add about four spoons of seeds to your wide-mouthed jar
- Add about three times more water than the seeds and soak them for about 12 hours
- Next, drain the jar
- After draining the water, you can add more fresh water and rinse the seeds.
- Drain it again and place the jar away from direct sunlight
- Make sure you rinse the seeds twice a day for a week or until they sprout.
- After the sprouts have become long enough, you can rinse them to remove the seed coats and seeds.
The height of the sprout varies with preference, so it’s up to you to decide the right size. Finally, you can consume them raw or cook them. Before storing them, make sure to drain them well. It would be best if you only preserved them for a maximum of 10 days.
5. The Spray and Tray Method
Instead of wicking water through the terra-cotta tray’s surface, this method will require you to spray some water on the seeds. The first thing you should do is pour some chia seeds on your tray or dish. After placing a thin layer of seeds, you can spray some water on them every day. You can spray it once in the evening and once when you wake up.
You can expose the seeds to sunlight indirectly throughout the day. If you do everything correctly, the seeds will sprout within seven to 10 days. To ensure that you don’t have to spray it too often, you can cover it using a glass or plastic cover. Covering the chia seeds will help you maintain their moisture level while increasing their germination rate.
6. Paper Towel Method
Another reliable and straightforward sprouting method is the paper towel technique. This sprouting method will require you to use some simple materials like a dish, some water, and two paper towels. All you have to do is:
- Fold two paper towels and place them on the base of a shallow tray or dish.
- Pour some water into the tray until the towels are moist enough.
- Pour some seeds on the moistened towels and keep them moist by adding water.
- After the seeds start sprouting, you can indirectly expose them to the sun.
7. The Jiffy Pot Method
This sprouting method will require you to use a 3-inch jiffy pot or a huge one. The organic pot’s wood or peat fibers can function as a wick. Therefore, you will be sure that the seeds will remain moist during the entire sprouting stage. To sprout the seeds using a jiffy pot, you should do the following:
- Start by soaking your jiffy pot in some water.
- Pour some water into the tray, plate, or dish.
- Roll the jiffy pots on the seeds until they are fully covered with the seeds.
- Place the pot on the dish or tray containing water upside down.
- Make sure you keep the water level at 1 cm by replacing the evaporated water every day.
- The seeds should start sprouting after a few days.
Interested in growing other microgreens? Read our guide on how to grow microgreens without soil.
Takeaway
Chia seeds are highly nutritious superfoods, but digesting these seeds can be pretty challenging because of their tough outer layer. It’s beneficial if you know how to sprout chia seeds to remove the tough outer layer of the seeds. By doing so, you get to enjoy all the nutritious benefits of the seeds. Plus, it’s a known fact that sprouts are more nutritious than fully grown plants.