A survival group needs someone with medical knowledge and supplies to treat orthopedic injuries and bleeding wounds. These are serious issues, and, indeed, the average survival medical kit concentrates on these issues to the exclusion of much else. Even well-prepared medics, however, don’t realize that they’ll be faced with a quite different challenge much more often: dental problems, especially dental trauma. Injuries or oral health issues can negatively affect the work efficiency of members of your group; if you’ve ever had to work with a bad toothache, you know exactly what I mean. In this article, we’ll discuss how to deal with dental trauma in survival settings.
DENTAL ANATOMY
First and foremost, the group medic should know dental anatomy. Luckily, a tooth is a relatively simple structure. The part of the tooth that you see above the gum line is called the “crown.” Hidden below the gum is the “root,” which resides in a bony jaw socket known as the “alveolus.” Teeth are anchored to alveolar bone with ligaments, just like you have ligaments holding together your knee or shoulder.
The tooth is composed of different materials:
Enamel: Enamel is the hard, white external covering of the tooth crown. Essentially, the tooth’s “armor.”
Dentin: Dentin is the firm yellowish material composed of many microscopic tubes underneath the enamel. When enamel is lost, heat or cold travels through these tubes to cause pain.
Pulp: The pulp is the softer tissue in the center surrounded by the dentin. The pulp contains blood vessels and nerve endings and is considered the “living” part of the tooth. When the nerve dies, the tooth dies.
A normal adult mouth has 32 teeth, most of which replace baby teeth by age 13. They are comprised of:
- Incisors (8 total): The middlemost four teeth on the upper and lower jaws.
- Canines (4 total): The pointed teeth just outside the incisors.
- Premolars (8 total): Teeth between the canines and molars.
- Molars (8 total): Flat teeth in the rear of the mouth.
- Wisdom teeth or third molars (4 total): These teeth erupt later, at around age 18. They are often surgically removed to prevent displacement of other teeth.
Different teeth have different purposes: Incisor and canines are for cutting, while molars are for grinding.
DENTAL TRAUMA
Dental trauma may appear in various forms. After an injury to the oral cavity, a person may have a:
- Dental Fracture: a portion of a tooth chipped or broken off.
- Dental Subluxation: a loose tooth.
- Dental Avulsion: a tooth knocked out completely.
DENTAL FRACTURES (BROKEN TEETH)
When a portion of a tooth is broken off, its categorization is based on the number of layers of the tooth that are exposed. Traditionally, dentists have referred to these as Ellis class 1, 2, and 3 fractures.

Ellis 1 fractures: In an Ellis 1 fracture, only the enamel has been broken and no dentin or pulp is exposed. This is a problem only if there is a sharp edge to the tooth. You can consider filing the edge smooth in some cases.

Ellis 2 fractures: Ellis 2 fractures show yellow or beige dentin under the enamel. This area may be sensitive and should be covered if possible. The composition of dentin is more porous than enamel and allows bacteria to enter and infect the tooth. The medic can improvise a mixture of oil of cloves, also known as eugenol, and zinc oxide powder to make a protective covering.

Ellis 3 fractures: Here the pulp and dentin are both exposed. Ellis 3 fractures can be quite uncomfortable. If the pulp is exposed, there may be some bleeding. The risk of permanent damage is likely, so protective coverings will be very important.
TREATING DENTAL FRACTURES
(Be aware that the methods discussed below are temporary measures which may very well require reapplication at one point or another.)
When you identify a fracture of a tooth due to external trauma, you should:
1) Evaluate the patient for associated damage to the face, especially the tongue, jaw, and the inside of the cheek. On occasion, a soft tissue laceration is found and must be sutured. Use an absorbable suture like plain “catgut,” PDS, or polyglycolic acid.
2 Use water to thoroughly flush and rinse the inside of the mouth for easier evaluation.
3) For you own protection, place a bite block; even a large grade school pink eraser or two will do.
4) Using your gloved hand or a cotton applicator, lightly touch the injured tooth to see if it’s loose.
5) For sensitive Ellis II fractures of dentin, dry the exposed surface and cover with temporary cement. Improvisations for austere settings include fluoride dental varnish, clear nail polish, or cyanoacrylate glue to decrease sensitivity.
6) Provide pain meds and cold packs (a thin cloth should be placed between the pack and the skin).
7) Instruct the patient to avoid hot and cold food or drink.
Ellis III fractures into pulp are more problematic, partially due to the high risk of infection. Calcium hydroxide (Dycal) on the pulp surface coupled with additional temporary cement can be used as protective coverings, but newer prescription materials known as “glass ionomers” are added in modern dentistry. Alternatively, a commercially-available product from India known as Prevest Fusion Flo is a composite material that may be useful, but must be “cured” with a UV dental curing light (available online) to harden.
When the pulp is involved in the fracture, antibiotics may be appropriate. Penicillin 500 mg orally every six hours or Doxycycline 100 mg orally twice a day for a week are acceptable options.
Particularly difficult dental fractures involve the root. Sometimes, it is not until the gum is peeled back that the damage to the root is exposed and identified. If this is the case off-grid, the tooth is likely unsalvageable (especially in vertical fractures) and should be extracted
DENTAL SUBLUXATIONS (LOOSE TEETH)

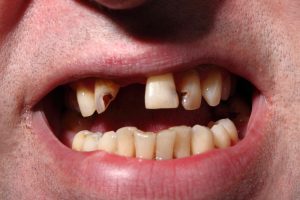
Above: 2 empty sockets due to dental avulsions with subluxations on either side
A tooth that is knocked loose but not out of its socket is called a “subluxation.” Use your gloved fingers or a cotton applicator lightly to identify any mobility. Often, these injuries will appear to bleed slightly from the border between the tooth and gum.
Minimal trauma may require no major intervention, although the tooth may benefit from support. The loose tooth should be pressed back into the alveolus (socket) and “splinted” to neighboring teeth for stability. Dentists use wire or special materials for this purpose, but you could use soft wax or specialized dental wax. Prevent further trauma by placing your patient on a liquid diet for a time.
DENTAL AVULSIONS (TEETH KNOCKED OUT)
Occasionally, the trauma may be severe enough to completely knock the tooth out of its socket. This is called a “dental avulsion.” The most favorable situation is when a tooth is knocked out in one piece, including the root and ligaments.
In this circumstance, time is a very important factor in treatment success. If the tooth is not immediately replaced or, at least, preserved in a solution, the success of re-implantation drops 1% every minute the tooth is not in its socket.
A good preservative for teeth that have been knocked out is “Hank’s Solution.” This is a balanced salt solution that has been used to culture living cells, and it helps protect raw ligament fibers. Hank’s Solution is available commercially as “Save-a-Tooth.” You must:
1) Find the tooth. Pick it up by the crown; avoid touching the root as it will damage already-compromised ligament fibers.
2) Flush the tooth clean of dirt and debris with water or saline solution. Don’t scrub it, as it will further damage the ligaments.
3) Place in preservative solution. If you don’t have Hank’s solution, place the tooth in milk, normal saline, egg white, or saliva (you can put it between your cheek and gums or under your tongue). This will keep the ligament cells viable longer than plain water would.
If the intact tooth has been out for less than fifteen minutes, you may attempt to re-implant it. Replacing a tooth isn’t always successful, but it’s worth a shot. You should:
1) Flush the tooth and the empty socket with Hank’s solution (Save-a-Tooth).
2) Replace the tooth in the socket.
3) Hold in place for five minutes, making sure the tooth is level with its neighbors.
4) Cover with cotton or gauze.
5) Have the patient slowly bite down to keep it in place.
6) Splint the tooth for two weeks with soft wax or adhesive putty. Some have recommended using cyanoacrylate glue and thin wire or the aluminum nosepiece from an N95 mask for support.
Place your patient on a liquid diet and, to prevent infection, consider antibiotics such as Penicillin 500 mg orally every 6 hours for 7-14 days or doxycycline 100 mg twice a day for 7-14 days.
If the tooth has been out longer than 15 minutes, you may have to soak the tooth for a half hour or so in Hank’s Solution before you replace it. The longer you wait to replace the tooth, however, the more painful it will be to replace due to swelling and other factors. Make sure you have pain meds and cold packs available in your supplies.
After a couple of hours of being out, the ligament fibers dry out and die; the tooth is, for most intents and purposes, dead. Replacing it at this point is likely to be unsuccessful, as the pulp will decay (like all dead soft tissue).
Don’t replace baby teeth. They may scar down and prevent mature teeth from emerging. A sobering fact is that the pulp rarely, if ever, survives the injury even if the ligaments do. As such, without the availability of root canal procedures to remove dead tissue, even your best efforts may be unsuccessful. If a serious infection arises in the dead pulp, your patient may be in a worse situation than just missing a tooth.
SURVIVAL DENTAL SUPPLIES
 survival dental kit by altonfirstaid.com
The prepared medic will include dental supplies in their storage, but what exactly will be useful and available for the family medic?
Gloves are one item that you should have in quantity. Don’t ever stick your bare hands in someone’s mouth without them. Other items to include in a solid survival dental kit include:
- Dental floss, dental picks, and toothbrushes.
- Toothpaste or baking soda.
- Dental or orthodontic wax to splint a loose tooth to its neighbors; candle wax will do in a pinch.
- A Rubber bite block to keep the mouth open and protect from bites.
- Cotton pellets, rolls, and applicators, as well as gauze sponges.
- Commercial temporary filling material, such as Tempanol, Cavit, or Den-temp.
- Oil of cloves, known as “eugenol,”, a natural anesthetic.
- Zinc oxide powder: Mix with clove oil to make temporary filling cement.
- Oral analgesics like benzocaine.
- Calcium hydroxide or “Dycal,” a protective barrier to cover pulp before placing filling cement.
- Oil of oregano, a natural antibacterial.
- A bulb syringe to blow air, which dries teeth for better visualization.
- An irrigation syringe to flush areas where work is being done.
- Scalpels to incise and drain abscesses.
- Dental probes, mirrors, tweezers, and scrapers/scalers.
- Spoon excavators to remove decayed material from a tooth.
- Elevators to help with extractions by separating ligaments from the socket.
- Extraction forceps. These instruments are like pliers with curved ends. You’ll need several types specific to upper and lower teeth, tooth type, and, sometimes, left and right.
- Dental blood-clotting agents.
- A suture kit.
- Cold packs, pain meds, and antibiotics.
All these items and more are included in this survival dental emergency kit.
Joe Alton MD





 Hank’s solution


