


Estimated reading time: 8 minutes
When you are building an emergency food supply, you rely on foods that have long shelf lives. Foods like beans, pasta, rice, and soups are versatile and store well. However, many of these pantry stalwarts are high in sodium and lacking in the nutrients found in fresh vegetables.
A great way around this problem is by growing your own fruits and vegetables. But what if lack of space or weather constraints limit your harvest?
Want to save this post for later? Click Here to Pin It On Pinterest!
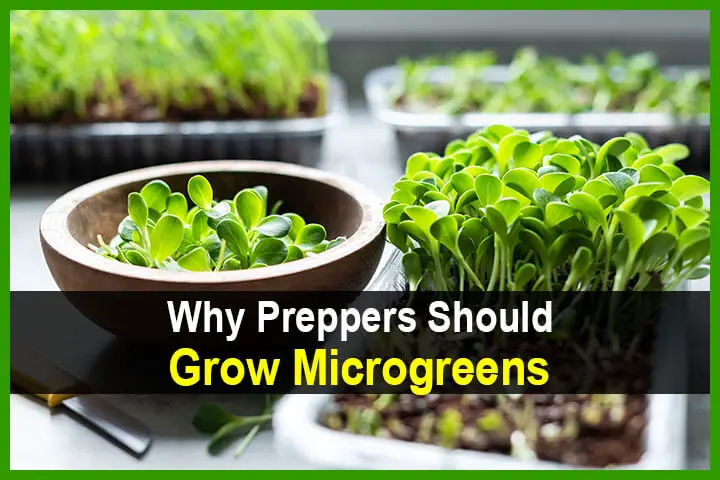
The Answer is Microgreens

Microgreens are the small, young greens that grow from the seeds of various vegetables and herbs. These delicate greens can be harvested with scissors in just about two weeks after germination, and they are packed with flavor, vitamins, and minerals. Studies indicate that microgreens can boast up to 40 times the nutritional content of mature plants.
Microgreens are mini versions of plants, unlike sprouts, which are germinated seeds. With sprouts, you eat the entire thing – seed and all. But you only eat the tiny leaves that grow above the soil, lowering the risk of food poisoning that comes with sprouts.
And what makes microgreens another excellent choice for preppers is that they are quick and easy to grow, and you only need soil, seeds, and a sunny windowsill.
What Are the Health Benefits of Microgreens?

Microgreens are concentrated sources of vitamins and minerals that are in the mature plant. Here are some examples:
- Cabbage microgreens have six times more vitamin C and three times more folate than mature red cabbage.
- Cilantro microgreens have three times more beta carotene than mature plants.
- Radish microgreens have twice the amount of calcium than full-grown radishes.
Different microgreens offer different vitamins, minerals, and nutrients. However, in general, microgreens are an excellent source of vitamins A, E, C, and K and minerals, including calcium, magnesium, iron, zinc, and selenium.
Their tiny stems and leaves also offer phytonutrients, polyphenols, and antioxidants that help fight certain diseases and support the immune system and gut microbiome health. For example, broccoli microgreens have a high concentration of the antioxidant sulforaphane, which can help lower fasting blood glucose levels and protect against some forms of cancer and heart disease.
Of course, it is important to consider that we typically eat microgreens in smaller quantities than their mature counterparts. But the advantages are clear when you weigh the ease and speed of growing microgreens over the full-grown plants.
How to Grow and Harvest Microgreens at Home

Growing microgreens is quick, easy, and inexpensive, and the best part is that you can keep a crop going all year round.
All you need are the seeds of your choice, containers, potting soil, water, and a sunny location. You can choose individual plant seeds or pre-packaged mixes of seeds.
You’ll want a container that is at least about two inches deep. You can use something you have on hand that will fit on your windowsill or order trays designed for this purpose. South-facing windows work best, but other windows can work, possibly with the addition of artificial light.
Fill the tray with organic potting mix and then loosen the soil before scattering the seeds across the top surface of the soil. Then, cover the seeds with a thin layer of soil. Lightly water the surface and aim to keep the soil moist.
You will see noticeable growth in just a few days to a week (longer in winter with fewer sunlight hours), and you should be able to harvest your microgreens in two weeks or sooner.
You will know when the greens are ready for harvesting once you see their first set of mature leaves.

Another way to know they are ready is to measure the height of the tiny plants. They should be at least 1-1 ½ inches tall before harvesting.
Use kitchen scissors to gently snip the plants off just above the soil line as soon as you see their first leaves begin to unfold. The shelf life of harvested microgreens is 10 to 14 days after harvesting.
Microgreens cannot generate new growth after you harvest them. However, you can leave the tiny roots where they are and plant new seeds in the same soil. In fact, the old roots offer organic material to nourish new seeds you grow in the same container.
Use a fork to lightly till the soil and begin again with a new batch of seeds. With little effort or expense, you can maintain a steady supply of microgreens for your family.
Top Choices of Microgreens
You’ll have the best results when you select seeds that are quick to sprout. Here are some recommendations.
- Alfalfa – Crunchy and crispy texture. Harvest in about six days.
- Azuki beans – Nutty, sweet taste. Harvest in about eight days.
- Beets – Mild, earthy taste. Harvest in about six days.
- Chickpeas – Mild, pleasant taste. Harvest in about four days.
- Green peas – Sweet taste. Harvest in about three days
- Lentils – Nutty, almost peppery taste. Harvest in about four days.
- Mung beans – Offer taste and texture to stir-fry dishes. Harvest in about six days.
- Mustard and cress – Spicy, light, peppery taste. Harvest in about seven days.
- Radish – Add crunch and mild peppery taste to salads. Harvest in about seven days.
How to Add Microgreens to Your Meals

You can pretty much add microgreens to any meal as a way to boost flavor and nutrition. Just be sure to wash them first. Here are some ideas:
1. Mix in with other greens in salads.
2. Use as a replacement for lettuce in sandwiches, wraps, tacos, burgers, and burritos.
3. Add to smoothies for increased fiber and nutrients. (Stick with mild-tasting greens flavors.)
4. Add to soups, veggie bowls, or noodle bowls right before serving for added flavor, texture, and nutrition.
5. Snack on them as is. (Try munching on pea shoots and sunflower shoots as a healthy snack.)
6. Make pesto. Substitute microgreens for basil in your favorite pesto recipe, or use this microgreen sunflower recipe. You can freeze leftover pesto in ice cube trays for future use.
7. Top eggs and potatoes. You can eat microgreens for breakfast by sprinkling them on top of fried or scrambled eggs or omelets or on breakfast potatoes just before serving.
8. Add to your stir-fries. Many microgreens add texture, flavor, and color to stir-fry dishes.
Here are some Asian varieties to consider:
- Pak Choy
- Mizuna
- Daikon Radish
- Wasabi
- Purple Shiso
- Tatsoi
- Shungiku
- Mitsuba

9. Try as a pizza topping on your pizza. Microgreens will add flavor, texture, and nutrition as a pizza topping. Arugula microgreens are a good choice. Take a look at this recipe.
10. Garnish almost anything. You can sprinkle microgreens on meats, pasta, rice dishes, and grilled vegetables. They are incredibly versatile.
Once you begin growing microgreens, you’ll wonder what took you so long to get started. Here are some resources for these tiny treasures.
Like this post? Don’t forget to Pin It On Pinterest!